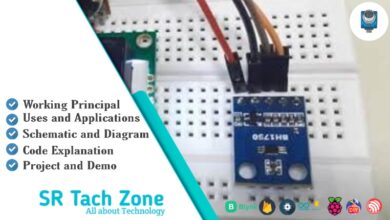
What is SW-420 Vibration Sensor ? & How Does It Work?
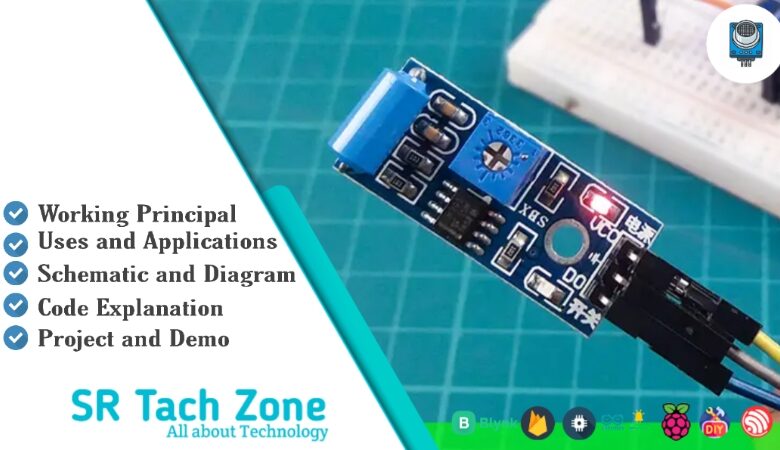
Welcome, Developers & Engineers!We’re excited to have you here. This space is built for creators, problem-solvers, and tech enthusiasts like you. Whether you’re exploring projects, diving into code, or just visiting a site that speaks your language, you’re in the right place. In this blog, you will gain insightful knowledge of the SW-420 Vibration Sensor Module. Moreover, understanding the basics of the SW-420 can greatly enhance your motion and shock detection projects. So, let’s get started.
What is SW-420 Sensor Module?
The SW-420 is a low-cost vibration switch sensor module that detects vibrations, shocks, or tilts using a spring-based mechanical switch. Consequently, it is widely used in hobbyist projects for alarm systems, vibration monitoring, and impact detection. This module provides both digital output (triggered when vibration exceeds threshold) and sometimes analog output on certain variants. Therefore, it is extremely easy to interface with microcontrollers like Arduino, ESP32, or Raspberry Pi. Additionally, it includes an onboard potentiometer to adjust sensitivity.
Working Principles of SW-420 Sensor Module?
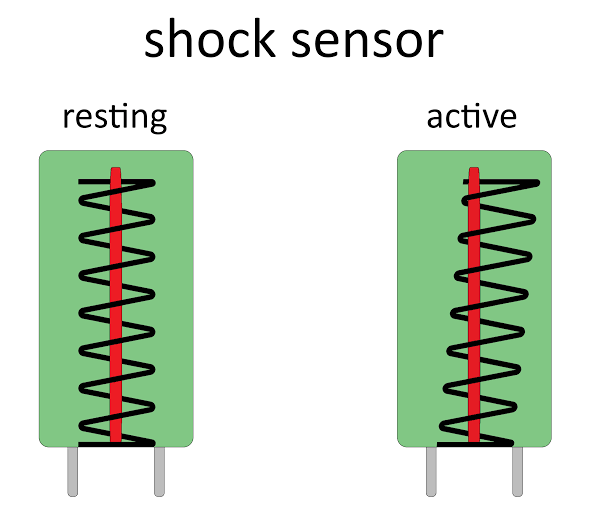
Vibration Detection: First, the core component is a spring-loaded metal ball or roller inside a conductive cylinder. When the module is at rest, the spring keeps the ball away from the contacts, so the circuit remains open.
Trigger Mechanism: Moreover, when vibration or shock occurs, the ball momentarily touches the conductive walls, closing the circuit. As a result, the digital output goes LOW (or HIGH depending on configuration) during vibration.
Sensitivity Adjustment: In addition, the onboard potentiometer (connected to a comparator like LM393) adjusts the threshold for how much vibration is needed to trigger the digital output. Furthermore, an onboard LED lights up when vibration is detected.
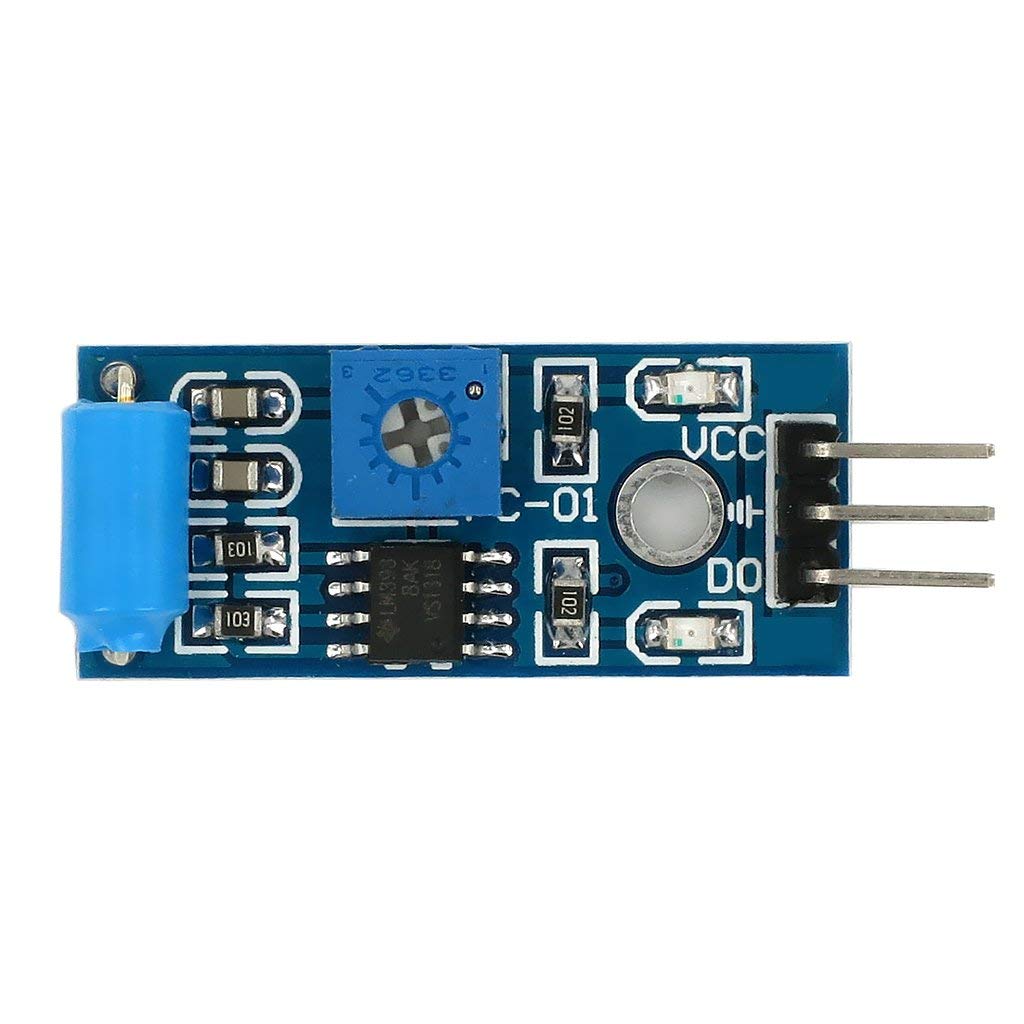
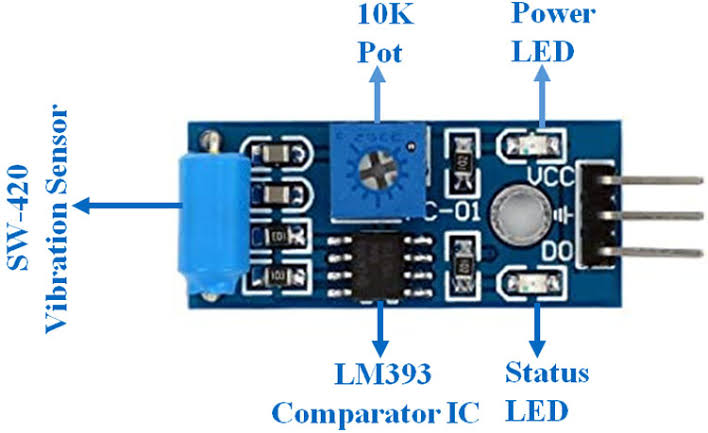
Hardware Overview of SW-420 Sensor Module?
The SW-420 module is a compact board with the vibration switch, comparator circuit (LM393), potentiometer, power LED, and status LED.

Most common versions have 3 pins (VCC, GND, DO), while some include AO for analog reading. As a result, it’s highly reliable for simple on/off vibration alerts.
Supporting Circuitry: Additionally, it uses a pull-up resistor and comparator to provide clean digital signals.
Consequently, no external components are required – just power and one digital pin for basic use.
Technical Specifications of SW-420 Sensor Module?
- Function: Vibration/shock detection switch.
- Output: Digital (HIGH/LOW), active LOW on vibration (some variants have AO).
- Sensor Type: Spring-based mechanical vibration switch.
- Operating Voltage: 3.3V to 5V DC.
- Current Consumption: <5 mA.
- Detection: Vibration, shock, tilt (adjustable sensitivity).
- Response Time: Instantaneous (mechanical contact).
- Pinout: VCC, GND, DO (digital out), sometimes AO.
- Operating Temperature: -20°C to 80°C.
- Durability: High (mechanical switch rated for millions of cycles).
SW-420 Sensor Module Pinout?
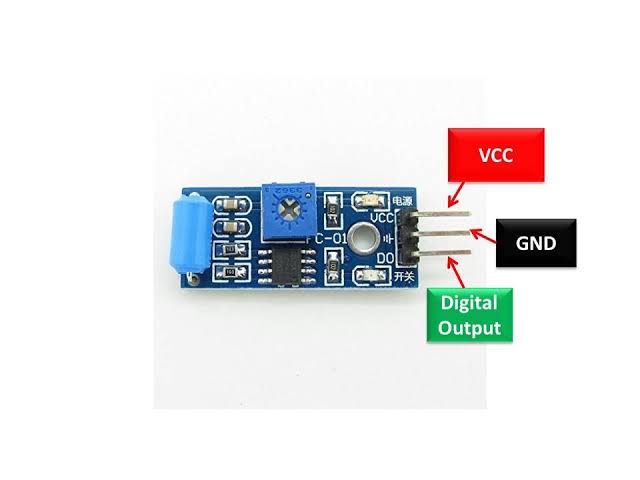
- VCC: Power supply (3.3V-5V)
- GND: Ground
- DO: Digital output (LOW when vibration detected)
- AO (on some versions): Analog output (optional)
Basic Connections to Arduino:
- VCC: Connect to 5V or 3.3V on Arduino
- GND: Connect to Arduino GND
- DO: Connect to any digital pin (e.g., pin 2)
Real Life Uses and Applications of SW-420 Sensor Module?
The SW-420 is perfect for simple, reliable vibration detection in educational and hobby projects.
- Vibration Alarms: Triggers buzzer on machine vibration or earthquake detection.
- Security Systems: Detects tampering or door knocking.
- Impact Detection: Logs shocks in shipping packages or vehicle black boxes.
- Tilt Switches: Activates when device is tilted beyond a certain angle.
- Robot Safety: Stops motors if excessive vibration occurs.
- Game Controllers: Detects shakes for interactive inputs.
- Industrial Monitoring: Alerts on equipment malfunction due to vibration.
Using SW-420 Sensor Module with Arduino
In this part, we will learn how you can use SW-420 with Arduino Uno, Nano, or Mega to detect vibrations in just a few minutes – even if you’re a beginner.
What You Need:
- Any Arduino board (Uno recommended)
- SW-420 Vibration Sensor Module
- Jumper wires
- Breadboard (optional)
Wiring Diagram:
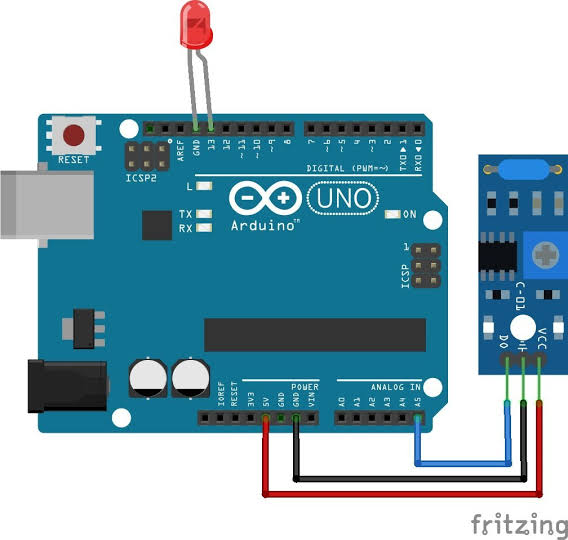
Connect directly – only three wires needed for digital operation.
Code:
No special library is required – just use digitalRead(). Here’s a tested simple code – just copy-paste into your Arduino IDE.
#define VIBRATION_PIN 2   // Connect DO to digital pin 2
#define LED_PIN 13        // Built-in LED for indication

void setup() {
  pinMode(VIBRATION_PIN, INPUT);
  pinMode(LED_PIN, OUTPUT);
  Serial.begin(9600);
  Serial.println("SW-420 Vibration Sensor Ready!");
}

void loop() {
  int vibration = digitalRead(VIBRATION_PIN);

  if (vibration == LOW) {
    Serial.println("Vibration Detected!");
    digitalWrite(LED_PIN, HIGH);  // Turn on LED
  } else {
    Serial.println("No Vibration");
    digitalWrite(LED_PIN, LOW);   // Turn off LED
  }

  delay(500);  // Update every 0.5 seconds
}
Note: This is a basic example using standard Arduino functions – no external library needed.
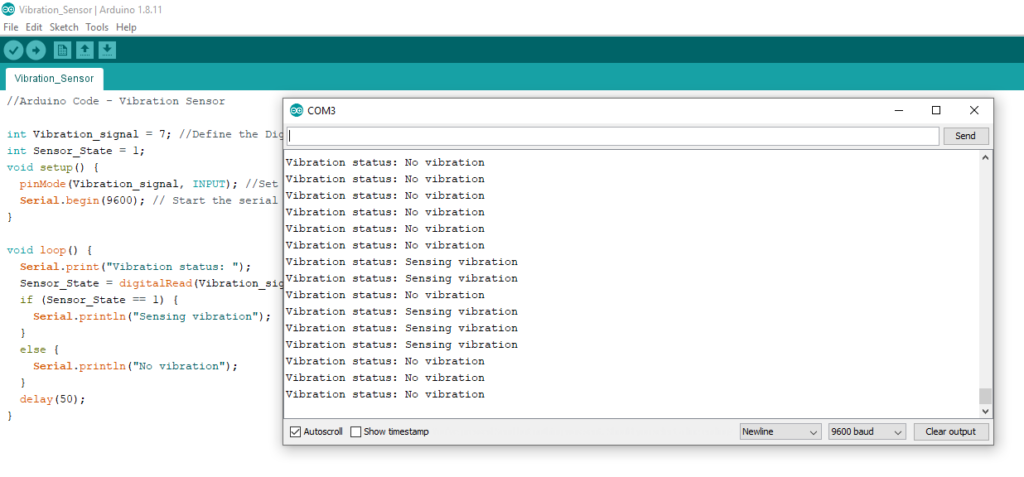
After uploading the code, open the Serial Monitor (Ctrl+Shift+M), set baud rate to 9600, and you’ll see messages like “Vibration Detected!” or “No Vibration”. Shake or tap the sensor to trigger it!
Note: Adjust the potentiometer clockwise to increase sensitivity. The sensor responds instantly to shocks. Moreover, mount it securely for consistent results, and avoid continuous strong vibrations to prolong switch life.
Wrapping up
In this post, we’ve covered all the fundamental aspects of the SW-420 Sensor Module. We trust that the information provided has been clear and insightful. Feel free to ask any questions you may have about this topic in the comment section below. We are here to help and provide additional clarification as needed.