What is IR Sensor Module? & How Does It Work?
Welcome, Developers & Engineers! We’re excited to have you here. This space is built for creators, problem-solvers, and tech enthusiasts like you. Whether you’re exploring projects or diving into code, you’ve just visited a site that speaks your language. In this blog, you will gain insightful knowledge of the IR Sensor Module. Understanding the basics of an IR sensor can greatly enhance your electronics and automation projects. So, let’s start.
What is an IR Sensor?
An IR Sensor (Infrared Sensor) is an electronic device that detects objects, motion, and surface differences using infrared light. It emits IR light using an IR LED and then measures the reflected light using a photodiode or phototransistor. Based on the amount of reflection received, the sensor can determine whether an object is present or not.
IR sensors are widely used in obstacle-avoiding robots, automatic hand sanitizers, smart dustbins, line-following robots, home automation, and security systems. They are affordable, easy to use, and work with almost any microcontroller.
Working Principles of IR Sensor Module
1. Infrared Transmission

The IR LED continuously emits infrared light. This light is invisible to our eyes, but electronic components can detect it easily. Think of it as a “flashlight” that shines IR light straight ahead.
2. Infrared Reception
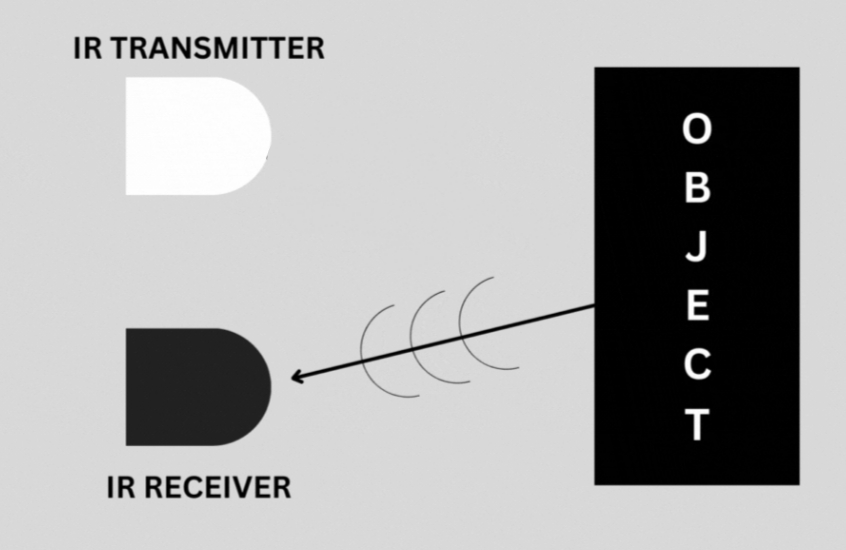
When the emitted IR light hits an object, some of it reflects back to the sensor. The photodiode or phototransistor detects this reflected IR light. If there is no object, very little light is reflected.
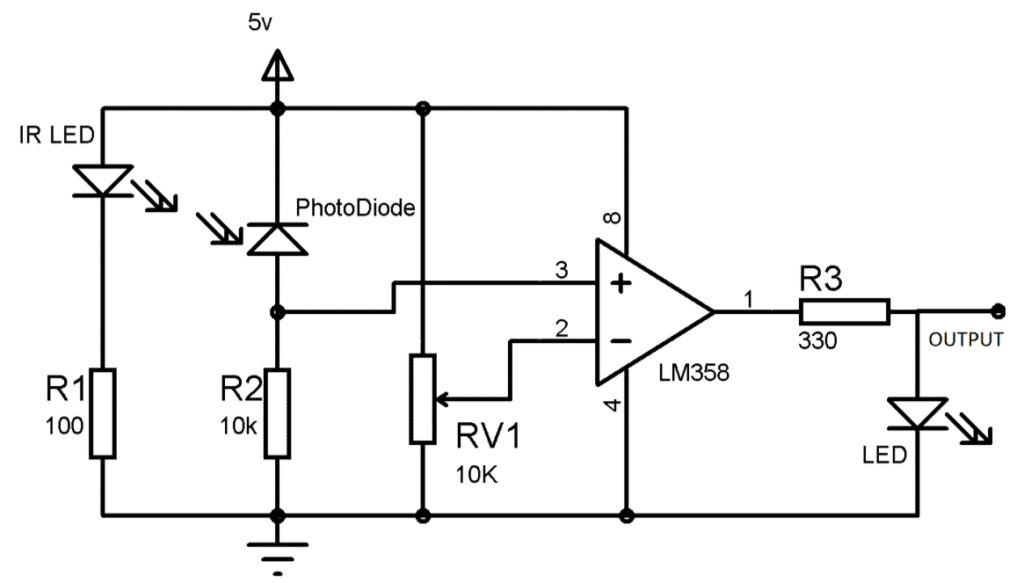
3. Signal Conversion
The onboard LM393 comparator compares the reflected IR intensity to a preset value (set using a potentiometer). If enough IR light is detected, the sensor outputs LOW (object detected). If not, it outputs HIGH (no object).
This simple mechanism allows the IR sensor to detect objects without any physical contact, making it ideal for automation and robotics.
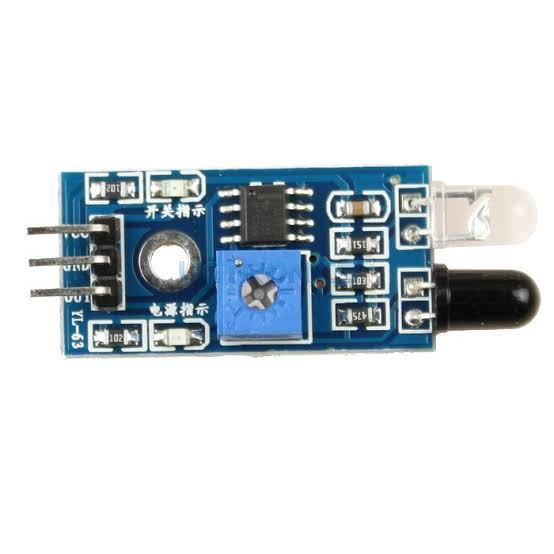
Hardware Overview of IR Sensor Module
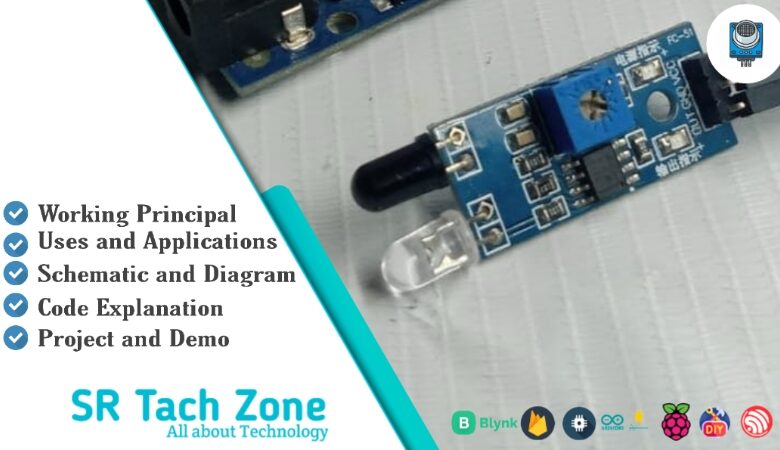
The IR Sensor Module usually comes with a compact PCB containing several essential components:
- IR LED – Emits infrared light.
- Photodiode / Phototransistor – Detects reflected IR light.
- LM393 Comparator IC – Converts analog reflection levels to digital output.
- Potentiometer – Adjusts detection sensitivity.
- Indicator LEDs – Shows module power and output status.
The module typically supports both 3.3V and 5V, making it compatible with Arduino, ESP, STM32, and most development boards.
IR Sensor Pins
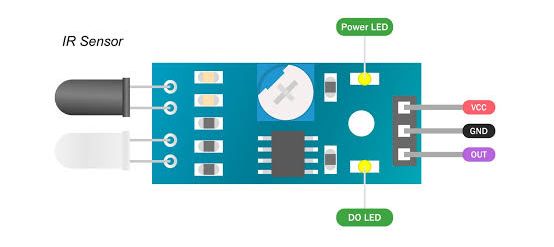
- VCC: Power input (3.3V – 5V)
- GND: Ground
- OUT: Digital output (HIGH or LOW)
Technical Specifications of IR Sensor Module
- Operating Voltage: 3.3V to 5V
- Output Type: Digital (0 or 1)
- Detection Range: 2cm to 30cm (adjustable)
- Signal Indicator: LED indicator for object detection
- Comparator: LM393
- Operating Current: 15mA to 20mA
- Wavelength: 940nm Infrared
- Response Time: Fast (microseconds)
Real Life Uses and Applications of IR Sensor Module
- Obstacle Avoidance in robotic cars and smart vehicles
- Automatic Hand Sanitizer using IR-based hand detection
- Smart Dustbin with auto-open lid
- Line Following Robots using reflective IR modules
- Security Systems for motion detection
- Industrial Machines for product counting
- Speed Measurement using IR break-beam systems
- Touchless Switches for home automation
Using IR Sensor with Arduino
Connecting an IR sensor to Arduino is incredibly easy. With just three wires and a few lines of code, you can detect objects or build automation projects.
What You Need
- Arduino Uno/Nano
- IR Sensor Module
- Jumper Wires
Wiring Diagram
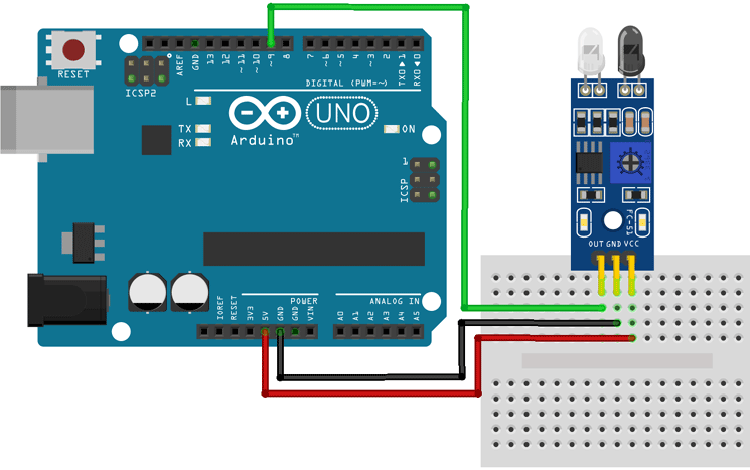
- VCC → 5V
- GND → GND
- OUT → D9 (or any digital pin)
Sample Code
int sensor = 9;

void setup() {
pinMode(sensor, INPUT);
Serial.begin(9600);
}

void loop() {
int state = digitalRead(sensor);

if (state == LOW) {
Serial.println("Object Detected!");
} else {
Serial.println("No Object");
}

delay(300);
}
Upload the code, open the Serial Monitor, and move your hand in front of the sensor. You will instantly see the detection status.
Wrapping Up
In this post, we’ve covered all the essential details of the IR Sensor Module — from working principles and hardware overview to real-life applications and Arduino integration. We hope this article helps you confidently use the IR Sensor in your upcoming projects. If you have any questions, feel free to ask in the comments section below — we’re here to help!