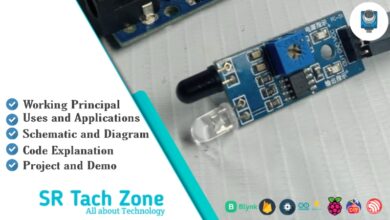
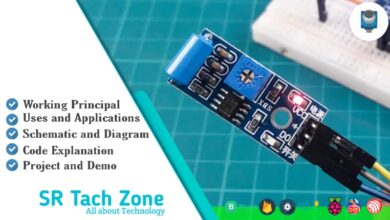
What is HC-SR04 Ultrasonic Distance Sensor & How does it work ?

Hey, Engineers ! ✨ What ever you’re a longtime subscriber or stumbling upon this website for the first time, I’m Riyad Munshi thrilled to have you here. Get ready for a journey into my blog, where you will learn everything about HC-SR04 Ultrasonic Distance Sensor.
What is HC-SR04 Ultrasonic Distance Sensor ?
The HC-SR04 Ultrasonic Sensor is a popular and widely used distance-measuring sensor in various devices. It works on the principle of ultrasonic waves to calculate the distance between the sensor and the object in its proximity. With its affordable price and high accuracy, the HC-SR04 has become a popular for many professional projects. With a precise measurement range of up to 4 meters, this sensor offers accuracy and reliability for various projects.
Working Principal of HC-SR04 Ultrasonic Distance Sensor!
The HC-SR04 Ultrasonic Sensor consists of two main components: 1. ultrasonic transmitter and 2. ultrasonic receiver. The transmitter emits a high-frequency sound wave, usually in the ultrasonic range, and the receiver detects the echo of this sound wave after it bounces off an object. By measuring the time it’s calculate the distance to the object.

To achieve accurate measurements, the HC-SR04 uses the time-of-flight principle. It calculate the time of travel the waves from the sensor to the object and back to sensor. Then converts it into a distance measurement using the formula, speed of sound in the air.
Distance Calculation
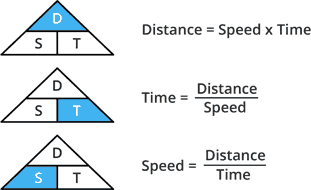
The distance (D) to the object can be calculated using the formula:
D = 1/2 x Speed of Sound x Round-Trip Time
The speed of sound in the air at room temperature is approximately 343 meters per second (or 34300 centimeters per second). The division by 2 accounts for the round-trip travel of the ultrasonic pulse.
Hardware Overview of HC-SR04 Ultrasonic Distance Sensor!
The HC-SR04 Ultrasonic Sensor consists of two main components: 1. ultrasonic transmitter and 2. ultrasonic receiver.
Ultrasonic Transmitter
The sensor contains an ultrasonic transmitter that generate ultrasonic waves, which are sound waves with frequencies higher than the upper limit of human hearing. In the context of sensors like the HC-SR04 Ultrasonic Sensor, the ultrasonic transmitter is a key component responsible for emitting short bursts of ultrasonic pulses.
Ultrasonic Receiver
An ultrasonic receiver is a component that detects ultrasonic waves, which are sound waves with frequencies higher than the upper limit of human hearing. In HC-SR04 Ultrasonic Sensor, the ultrasonic receiver plays a crucial role in capturing and processing the echoes of transmitted ultrasonic pulses.
Technical Specifications
- Operating Voltage: DC 5V
- Operating Current: 15 mA
- Measuring Range: 2 cm to 400 cm (1 inch to 13 feet)
- Accuracy: Up to 3 mm
- Ultrasonic Frequency: 40 kHz
- Maximum Operating Current: 15 mA
- Trigger Input Pulse Width: 10 µs (microseconds)
- Echo Output Pulse Width: Output duration is directly proportional to the measured distance
- Minimum Detection Distance: 2 cm
- Maximum Detection Distance: 400 cm
- Temperature Compensation: The module compensates for temperature variations to maintain accuracy.
- Trigger Method: The sensor is typically triggered by a 10 µs high-level pulse on the Trigger pin.
- Echo Output: The Echo pin outputs a pulse whose width is proportional to the distance of the object.
- Operating Temperature: -15°C to 70°C
- Storage Temperature: -20°C to 80°C
- Dimension: 45 x 20 x 15mm
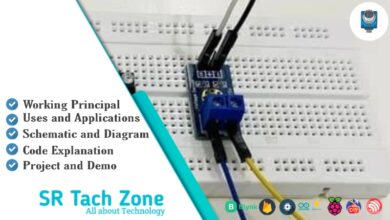
Pin out of HC-SR04 Ultrasonic Distance Sensor
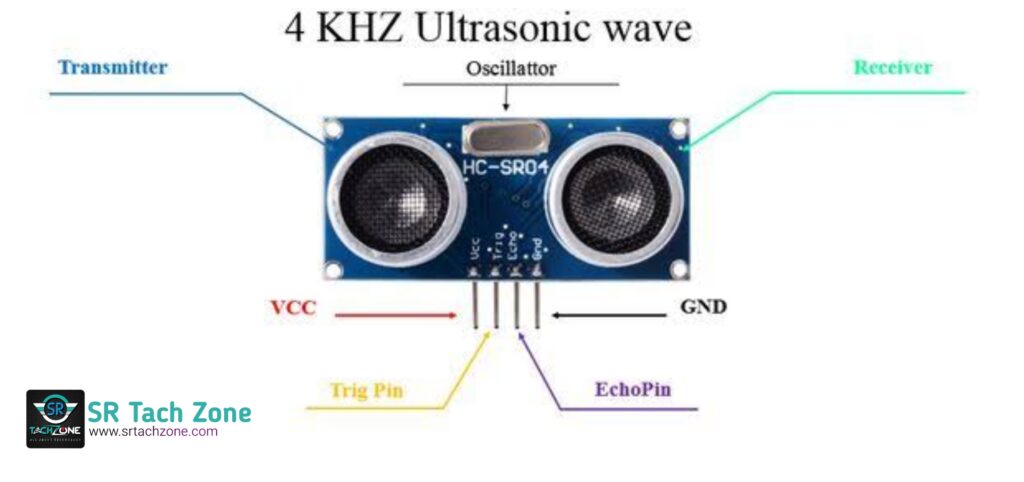
- Trig Pin: This pin is used to trigger the sensor to send out an ultrasonic pulse. It is usually a digital output.
- Echo Pin: This pin is used to receive the echo pulse. It provides a pulse whose duration is proportional to the distance of the detected object. It is typically a digital input.
- VCC Pin: The sensor usually requires a power supply of +5V.
- GND PIn: This is the ground connection for the sensor.
Uses and Application of HC-SR04 Ultrasonic Distance Sensor
- The HC-SR04 sensor uses in a wide range of fields and projects. Its versatility and ease of use make it a popular choice for hobby project and professional project. Some common applications are,
- Obstacle Avoidance: If you’re building a robot or a smart car, the HC-SR04 sensor can help detect obstacles in its path and navigate around them.
- Proximity Detection: By measuring distances accurately, this sensor can be used to detect the presence of the objects and trigger actions accordingly.
- Liquid Level Measurement: The HC-SR04 sensor can also use to measure the level of liquids in tanks or containers. Providing valuable data for automation systems.
- Security Systems: Integrating the HC-SR04 sensor into security systems allows for motion detection and a reliable means of perimeter surveillance.
- Distance Tracking: The sensor’s ability to measure distances precisely makes it a valuable tool for applications involving tracking or monitoring objects over a specific range.
Measure Distance using HC-SR04 Ultrasonic Distance Sensor & Arduino
To measure distance using the HC-SR04 Ultrasonic Distance Sensor and Arduino, you can do these simple steps with me.
Wiring:
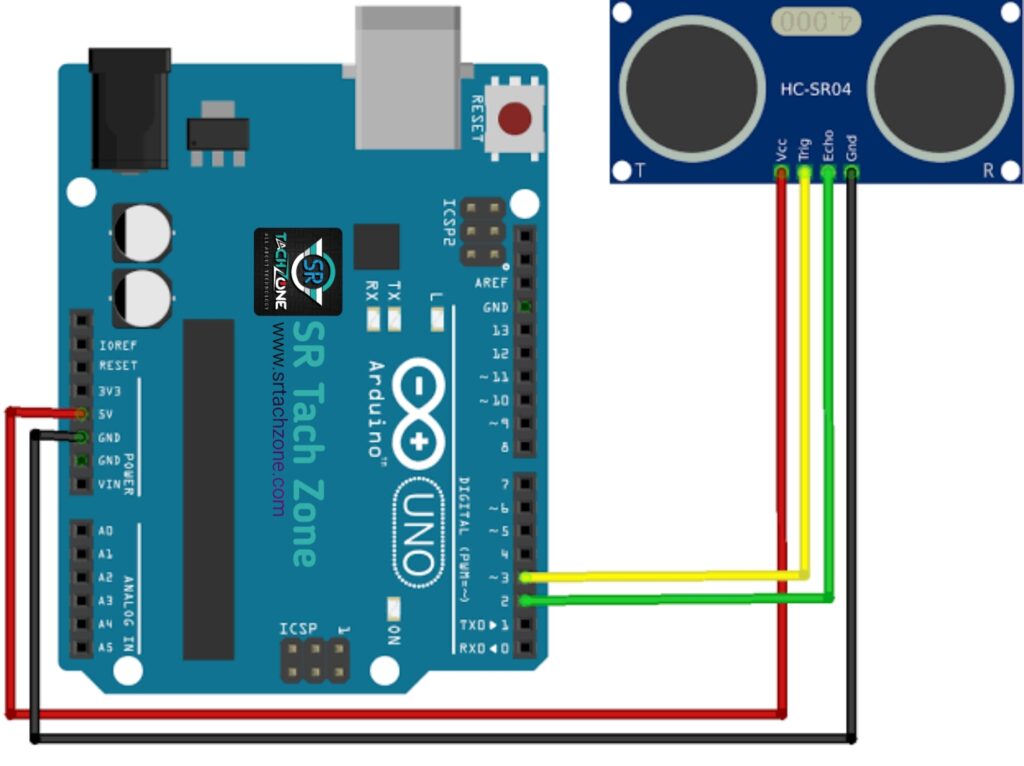
- VCC to 5V
- Trig to Digital Pin 2 (mention in program)
- Echo to Digital Pin 3 (mention in program)
- GND to GND
Arduino Code
/*
Project:  Measure Distance using HC-SR04 Ultrasonic Distance Sensor & Arduino
Full Project Link: https://srtachzone.com/what-is-hc-sr04-ultrasonic-distance-sensor-how-does-it-work/
*/

// Define the pins
const int triggerPin = 2;
const int echoPin = 3;

// Variables for distance calculation
long duration;
int distance;

void setup() {
  // Initialize serial communication for debugging
  Serial.begin(9600);

  // Set trigPin as an OUTPUT and echoPin as an INPUT
  pinMode(triggerPin, OUTPUT);
  pinMode(echoPin, INPUT);
}

void loop() {
  // Clear the trigPin
  digitalWrite(triggerPin, LOW);
  delayMicroseconds(2);

  // Activate the ultrasonic pulse by setting trigPin to HIGH for 10 microseconds
  digitalWrite(triggerPin, HIGH);
  delayMicroseconds(10);
  digitalWrite(triggerPin, LOW);

  // Read the duration of the pulse on echoPin
  duration = pulseIn(echoPin, HIGH);

  // Calculate the distance in centimeters
  distance = duration * 0.034 / 2;

  // Print the distance to the Serial Monitor
  Serial.print("Distance: ");
  Serial.print(distance);
  Serial.println(" cm");

  // Wait for a short moment before taking the next measurement
  delay(500);
}
Testing
Connect your Arduino to your computer. Open the Arduino IDE, copy and paste the code. Upload the code to your Arduino. Open the Serial Monitor to view the measured distances.
This simple code provides a basic example of how to measure distance using the HC-SR04 sensor with an Arduino. You can customize the code based on your specific project.
Wrapping up
In this Post we have clear all fundamentals of HC-SR04 Ultrasonic Distance Sensor. I hope you understand. Ask any Question on this topic in the comment box.
Hi i’m porno siteleri. i want to build a project with this sensor. plz help me. i will paid for this
Please Contract Us Any Technical Help : srtachzone@gmail.com
we will definitely help u, contract us : srtachzone@gmail.com
Good One
Your audience, your profits—become an affiliate oneday!