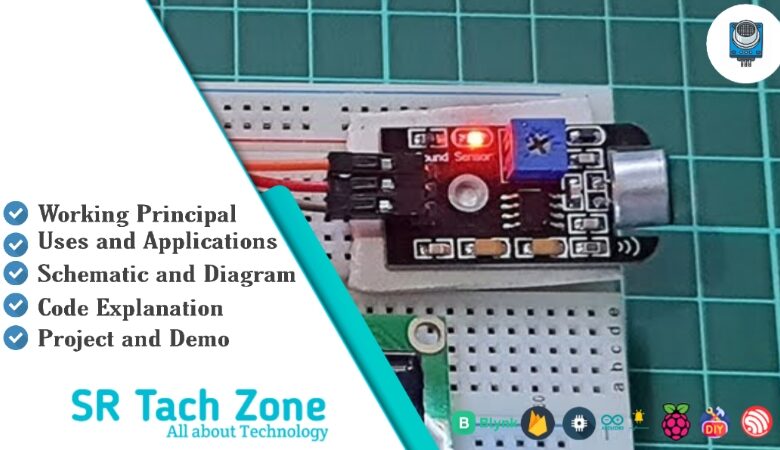
What is KY-038 Sound Detection Sensor ? & How Does It Work?
Welcome, Developers & Engineers!We’re excited to have you here. This space is built for creators, problem-solvers, and tech enthusiasts like you. Whether you’re exploring projects, diving into code, or just visiting a site that speaks your language, you’re in the right place. In this blog, you will gain insightful knowledge of the KY-038 Sound Sensor Module. Moreover, understanding the basics of the KY-038 can greatly enhance your sound detection and audio-triggered projects. So, let’s get started.
What is KY-038 Sound Sensor Module?
The KY-038 is a popular, low-cost sound detection sensor module that uses an electret microphone to detect ambient sound levels. Consequently, it is widely used in Arduino and microcontroller projects for clap detection, noise monitoring, and voice-activated controls. This module provides both analog output (proportional to sound intensity) and digital output (triggered above a set threshold). Therefore, it is very versatile and easy to interface with boards like Arduino, ESP32, or Raspberry Pi. Additionally, it includes onboard potentiometers for sensitivity adjustment.
Working Principles of KY-038 Sound Sensor Module?
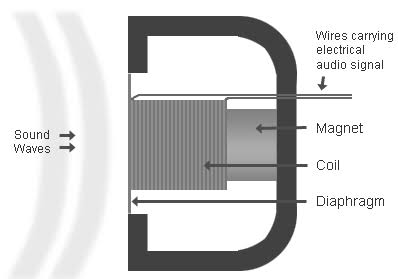
Sound Detection: First, the built-in electret condenser microphone converts sound waves into a tiny electrical signal. This signal varies with sound intensity.
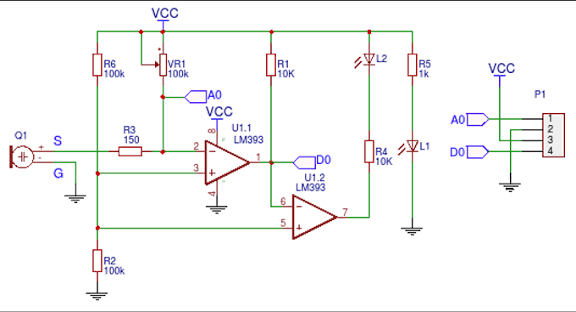
Analog Output: Moreover, the module amplifies this signal using an onboard op-amp (usually LM393 or similar). As a result, the AO (analog out) pin provides a voltage that rises with louder sounds.
Digital Output: In addition, a comparator circuit compares the amplified signal against a threshold set by the potentiometer. When the sound exceeds the threshold, the DO (digital out) pin goes LOW (or HIGH depending on version) and an onboard LED lights up.
Sensitivity Adjustment: Furthermore, most versions have two potentiometers: one for analog sensitivity and one for digital threshold.
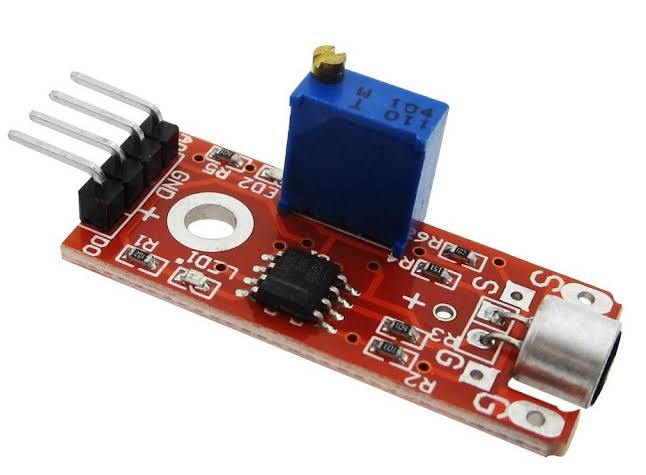
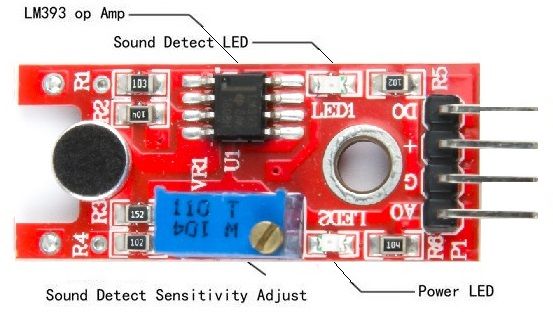
Hardware Overview of KY-038 Sound Sensor Module?
The KY-038 module is a small board with an electret microphone, dual op-amp/comparator (LM393), two potentiometers, power LED, and output LEDs.
There are slight variations: some have 4 pins (VCC, GND, AO, DO), others add a digital mode selection. As a result, always check your specific version.
Supporting Circuitry: Additionally, it includes resistors and capacitors for signal conditioning and noise filtering.
Consequently, it’s extremely beginner-friendly and requires no external components.
Technical Specifications of KY-038 Sound Sensor Module?
- Function: Sound detection with analog and digital outputs.
- Output: Analog (0-VCC proportional to sound) + Digital (HIGH/LOW trigger).
- Microphone Type: Electret condenser.
- Operating Voltage: 3.3V to 5V DC.
- Current Consumption: ~4-5 mA.
- Detection Range: Adjustable via potentiometer (typical 1-3 meters for claps).
- Frequency Response: Approximately 50 Hz – 15 kHz.
- Pinout: Usually VCC, GND, AO (analog out), DO (digital out).
- Digital Output Behavior: Active LOW when sound detected (LED on).
- Sensitivity Adjustment: Two onboard potentiometers (one for AO, one for DO threshold).
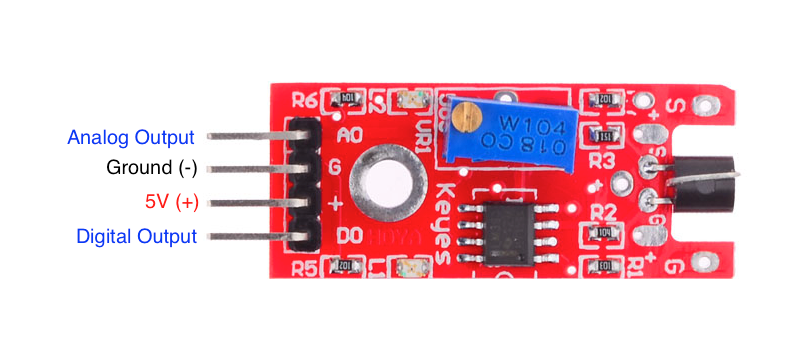
KY-038 Sound Sensor Module Pinout?
- VCC: Power supply (3.3V-5V)
- GND: Ground
- AO: Analog output (voltage proportional to sound level)
- DO: Digital output (LOW when sound threshold exceeded)
Basic Connections to Arduino:
- VCC: Connect to 5V or 3.3V on Arduino
- GND: Connect to Arduino GND
- AO: Connect to analog pin (e.g., A0) for sound intensity
- DO: Connect to digital pin (e.g., 2) for trigger
Real Life Uses and Applications of KY-038 Sound Sensor Module?
The KY-038 is ideal for simple, low-cost sound-activated projects in education and hobbyist robotics.
- Clap Switches: Turns lights or appliances on/off with claps.
- Sound-Activated LEDs: Creates visualizers that react to music or voice.
- Noise Level Monitors: Alerts when environment gets too loud.
- Security Systems: Detects unusual noises like knocking or breaking glass.
- Robot Control: Enables voice or clap commands for movement.
- Interactive Toys: Responds to sounds for games or animations.
- Environmental Logging: Records peak noise events.
Using KY-038 Sound Sensor Module with Arduino
In this part, we will learn how you can use KY-038 with Arduino Uno, Nano, or Mega to detect sound levels and triggers in just a few minutes – even if you’re a beginner.
What You Need:
- Any Arduino board (Uno recommended)
- KY-038 Sound Sensor Module
- Jumper wires
- Breadboard (optional)
Wiring Diagram:

Connect directly – use both AO and DO for full functionality.
Code:
No special library is required – just use analogRead() and digitalRead(). Here’s a tested simple code – just copy-paste into your Arduino IDE.
#define ANALOG_PIN A0   // Analog output
#define DIGITAL_PIN 8   // Digital output
#define LED_PIN 13      // Built-in LED

void setup() {
  pinMode(DIGITAL_PIN, INPUT);
  pinMode(LED_PIN, OUTPUT);
  Serial.begin(9600);
  Serial.println("KY-038 Sound Sensor Ready!");
}

void loop() {
  int analogValue = analogRead(ANALOG_PIN);
  int digitalValue = digitalRead(DIGITAL_PIN);

  Serial.print("Analog Value: ");
  Serial.print(analogValue);

  if (digitalValue == LOW) {
    Serial.println("  |  Sound Detected! (Digital Trigger)");
    digitalWrite(LED_PIN, HIGH);
  } else {
    Serial.println("  |  Quiet");
    digitalWrite(LED_PIN, LOW);
  }

  delay(200);  // Update every 200ms
}
Note: This is a basic example using standard Arduino functions – no external library needed.
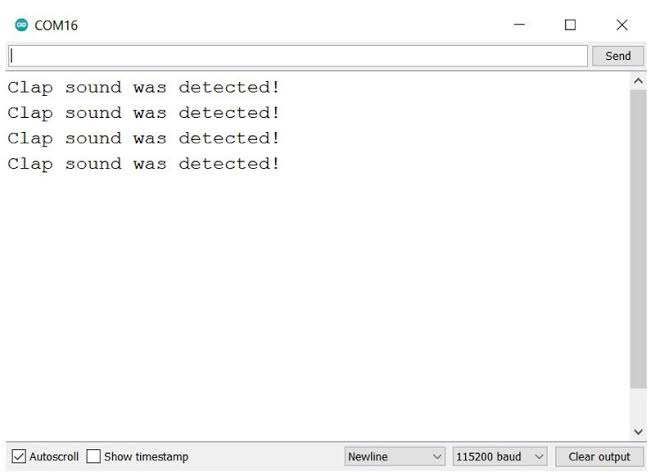
After uploading the code, open the Serial Monitor (Ctrl+Shift+M), set baud rate to 9600, and you’ll see analog values and trigger messages. Clap or speak near the microphone to test detection!
Note: Adjust the potentiometers: turn clockwise to increase sensitivity. The digital trigger is great for simple on/off actions, while analog gives finer sound level data. Moreover, shield the microphone from wind or breath for stable readings.
Wrapping up
In this post, we’ve covered all the fundamental aspects of the KY-038 Sound Sensor Module. We trust that the information provided has been clear and insightful. Feel free to ask any questions you may have about this topic in the comment section below. We are here to help and provide additional clarification as needed.