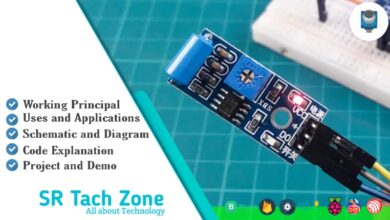
What is GUVA-S12SD UV Sensor & How Does It Work?

Welcome, Developers & Engineers! Welcome back! If you’re working on weather stations, environmental monitoring, UV index detectors, or skin-safety projects, then today’s sensor is going to be super useful for you. In this post, we’re exploring the GUVA-S12SD UV Sensor. A compact, accurate, and beginner-friendly sensor widely used to measure ultraviolet light levels. Let’s break it down in a simple, student-friendly way so you fully understand how it works and how to use it.
What is GUVA-S12SD UV Sensor?
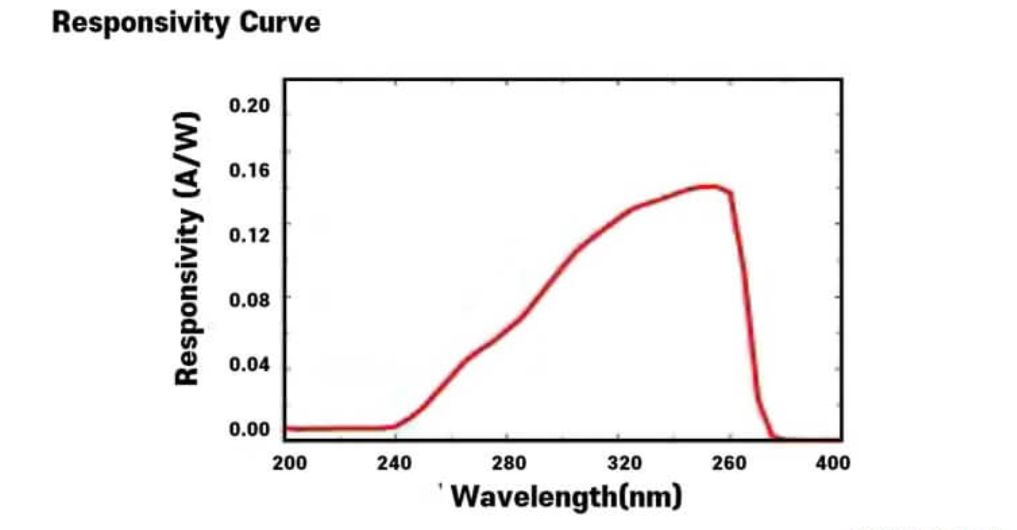
The GUVA-S12SD is an analog ultraviolet (UV) light sensor designed to detect UV-A radiation in the wavelength range of 240–370 nm. It outputs a small analog voltage that corresponds to the UV intensity. This makes it great for building UV index meters, sun exposure alarms, smart outdoor devices, and environmental monitoring systems. The sensor is compact, consumes very little power, and works perfectly with Arduino, ESP8266, ESP32, and Raspberry Pi.
Working Principles of GUVA-S12SD Sensor
UV Detection Mechanism
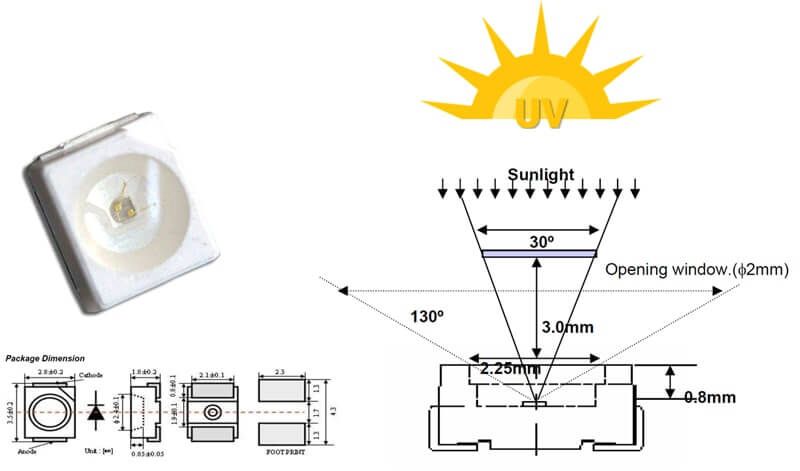
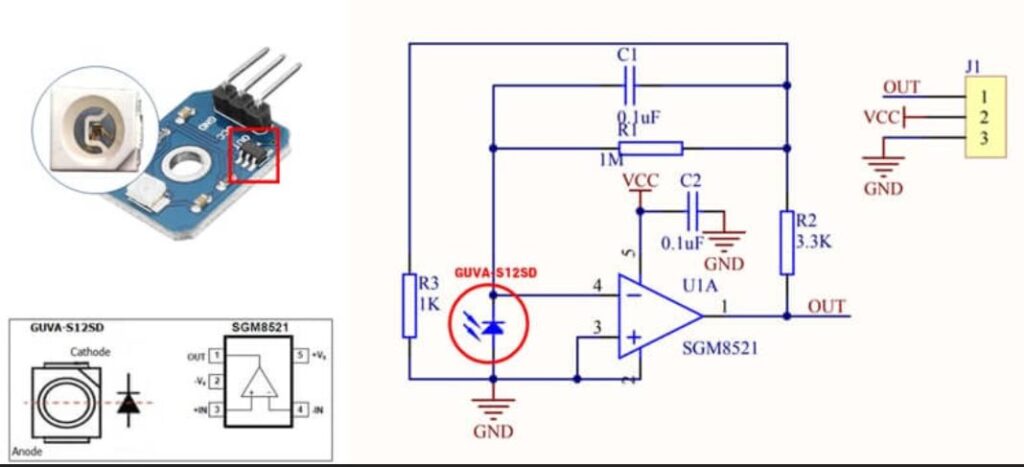
The GUVA-S12SD uses a special semiconductor photodiode made from GaN (Gallium Nitride). When UV photons hit the photodiode, they generate a small photocurrent. The stronger the UV light, the higher the current produced.
This photocurrent is then converted into an analog voltage that can be read using any microcontroller’s ADC pin. You can later convert this analog value into UV intensity (mW/cm²) or UV index.
Analog Output
The sensor outputs a voltage between 0V to 1V depending on UV intensity:
- Low UV → low voltage
- High UV → higher voltage
Because the output is small, many modules include an onboard amplifier to boost the signal for easier reading.
High Sensitivity
The GUVA-S12SD is highly sensitive to UV-A radiation (320–400 nm), which is the type of UV that affects human skin, plants, and outdoor materials. This makes it ideal for safety and environmental applications.
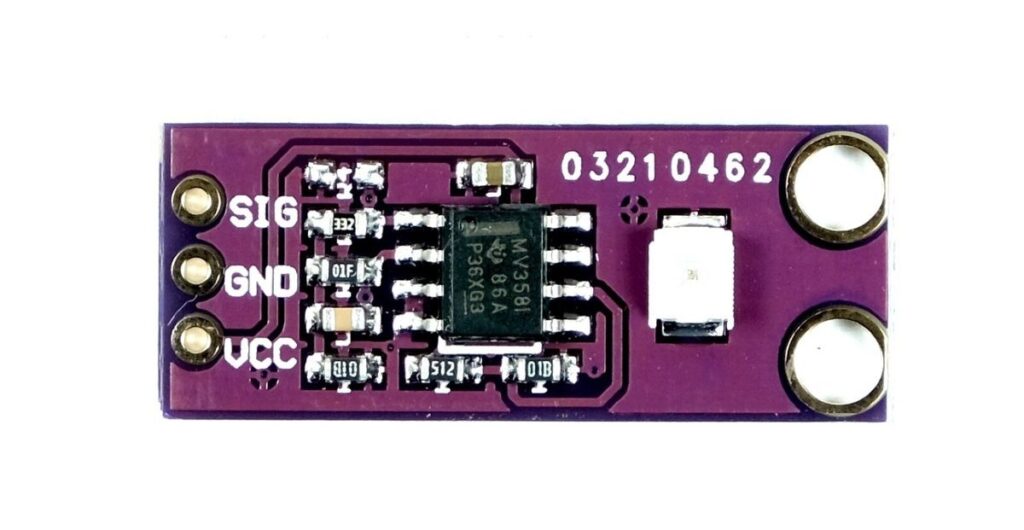
Hardware Overview of GUVA-S12SD Sensor
The sensor module typically includes:
- GUVA-S12SD photodiode
- Op-amp signal conditioner
- 3-pin interface
- Reverse polarity protection
- Filtering capacitors
Sensor Pinout
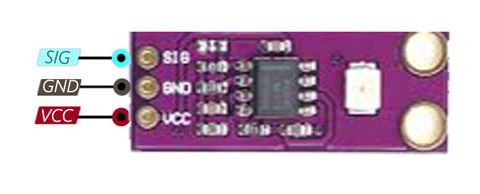
- VCC: 3.3V – 5V power input
- GND: Ground
- OUT: Analog output (0 – 1V typically)
Technical Specifications of GUVA-S12SD
- Operating Voltage: 3.1V – 5.5V
- Current Consumption: ~100 μA (very low power)
- Output Voltage Range: 0V – 1V
- Wavelength Detection Range: 240 nm – 370 nm
- Typical Sensitivity: 0.1 V per mW/cm²
- Response Time: < 0.5 seconds
- Operating Temperature: -25°C to +85°C
- Output Type: Analog voltage
Real Life Uses and Applications of GUVA-S12SD Sensor
- UV Index Meter: Build your own portable UV monitoring device.
- Weather Stations: Measure sunlight and harmful UV exposure.
- Smart Agriculture: Monitor UV intensity for plant growth optimization.
- Skin-Safety Devices: Alert users when UV levels get too high.
- Outdoor IoT Sensors: UV-based environmental tracking.
- Material Testing: Detect UV damage levels on plastics or paint.
Using GUVA-S12SD Sensor with Arduino
Reading UV levels with Arduino is very simple because the sensor outputs an analog signal. Let’s get started!
What You Need
- Arduino Uno, Nano, Mega, or compatible
- GUVA-S12SD UV Sensor Module
- 3 jumper wires
- Breadboard (optional)
Wiring Diagram
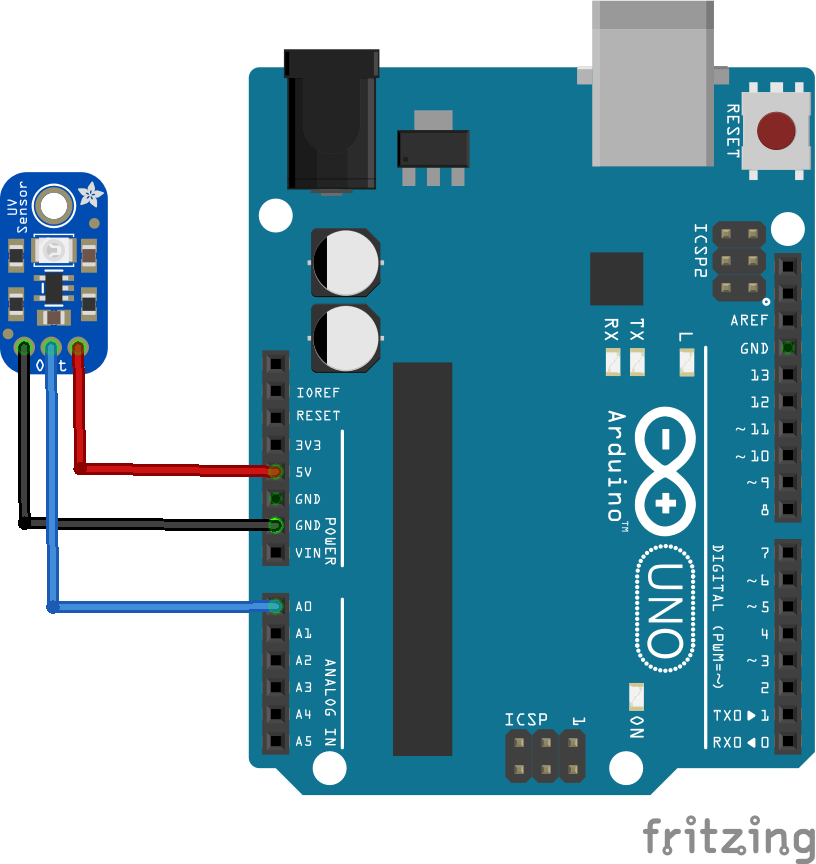
- VCC → 5V
- GND → GND
- OUT → A0
Arduino Code Example
#define UV_PIN A0

void setup() {
  Serial.begin(9600);
  Serial.println("GUVA-S12SD UV Sensor Ready!");
}

void loop() {
  int sensorValue = analogRead(UV_PIN);

  float voltage = sensorValue * (5.0 / 1023.0);

  // Convert voltage to UV intensity (approximation)
  float uvIntensity = voltage * 100.0; // mW/m² (approx, depending on module)

  Serial.print("Analog Value: ");
  Serial.println(sensorValue);

  Serial.print("Voltage: ");
  Serial.print(voltage);
  Serial.println(" V");

  Serial.print("UV Intensity: ");
  Serial.print(uvIntensity);
  Serial.println(" mW/m²");

  Serial.println("------------------------");
  delay(2000);
}
This simple code reads the UV sensor voltage and gives an approximate UV intensity value. You can extend this further to calculate UV Index for real-time UV safety monitoring.
Tips for Accurate UV Measurements
- Never place the sensor indoors; it is designed for outdoor UV detection.
- Avoid shadows — ensure direct sunlight for correct readings.
- Use a clean transparent cover if installing outdoors.
- Remember: UV is highest between 11AM and 3PM.
Wrapping Up
In this article, we explored the GUVA-S12SD UV Sensor — how it works, its features, real-life applications, and how to interface it with Arduino. This sensor is perfect for UV index meters, smart farming, weather projects, and environmental IoT devices. We hope this guide helps you build awesome UV-related projects. If you have any questions, feel free to drop them in the comments — we’re always here to help!