What is BMP280 Sensor? & How does it’s work ?

Welcome, Developers & Engineers! Hey there! Glad to have you here. If you’re someone who loves exploring sensors and smart electronics, you’re in the right place. Today, we’ll be learning about one of the most reliable and widely used environmental sensors the BMP280 Sensor. Understanding the basics and applications of the BMP280 can take your projects to the next level, especially when working with weather monitoring or IoT systems. So, let’s get started!
What is BMP280 Sensor?
The BMP280 is a high-precision digital barometric pressure and temperature sensor developed by Bosch Sensortec. It is the upgraded version of the BMP180 sensor and is designed for low power consumption, high accuracy, and faster data output. The BMP280 can measure both atmospheric pressure and temperature and can even calculate the approximate altitude based on the pressure readings.
This sensor is widely used in applications such as weather forecasting, indoor navigation, drone altitude tracking, and IoT-based environmental monitoring systems. It supports both I²C and SPI communication, which makes it easy to connect with most microcontrollers like Arduino, ESP32, Raspberry Pi, and STM32 boards.
Working Principles of BMP280 Sensor
Pressure Measurement
The BMP280 measures air pressure using a MEMS (Micro-Electro-Mechanical System) pressure sensor. It contains a small diaphragm that slightly deforms when the air pressure changes. The resulting mechanical stress is converted into an electrical signal, which is then digitized using an internal Analog-to-Digital Converter (ADC). The BMP280 offers a pressure measurement range from 300 hPa to 1100 hPa with a resolution of 0.16 Pa — that’s incredibly precise!
Temperature Measurement
To ensure accurate pressure readings, the BMP280 includes an integrated temperature sensor. This allows it to automatically compensate for temperature variations. The temperature sensor is a semiconductor-based sensor with an accuracy of ±1°C. Both pressure and temperature readings are factory calibrated and ready to use right out of the box.
Digital Communication
The BMP280 supports two types of digital communication protocols — I²C and SPI. Using I²C requires only two wires (SDA for data and SCL for clock), while SPI uses four wires (MOSI, MISO, SCK, and CS). This flexibility allows you to choose the interface that best suits your project. In most Arduino projects, I²C is preferred for simplicity, while SPI is used for faster data transfer in advanced applications.
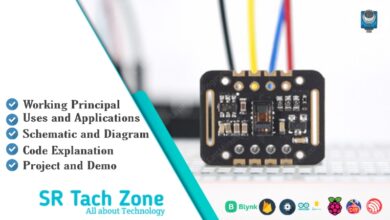
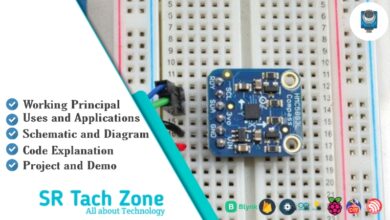
Hardware Overview of BMP280 Sensor
The BMP280 module is a small rectangular board featuring the Bosch BMP280 chip at its center. It includes onboard voltage regulation, pull-up resistors, and communication pins for I²C/SPI. Typical modules operate with input voltages ranging from 3.3V to 5V, making them compatible with both 3.3V and 5V logic systems like Arduino and ESP32.

- BME280 Sensor: measures temperature, humidity, pressure
- Pull-up Resistor: enables I²C communication (SCL/SDA)
- Pull-down Resistor: forces SPI mode (on CSB)
- Filter Capacitor: reduces power noise (VCC)
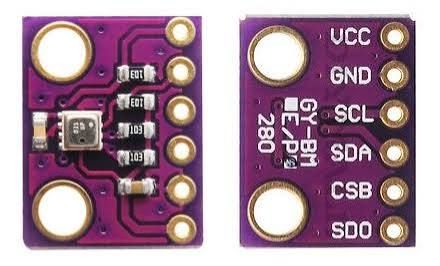
BMP280 Pinout
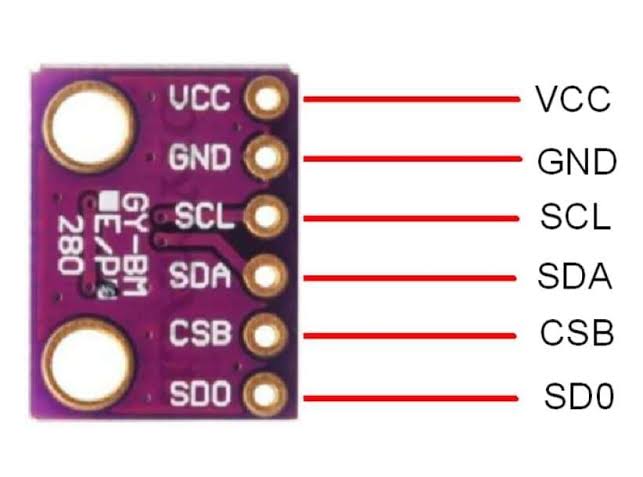
- VCC: Power supply (3.3V–5V)
- GND: Ground connection
- SDA: I²C Data Line
- SCL: I²C Clock Line
- CSB: Chip Select for SPI (set LOW for SPI mode)
- SDO: SPI Data Output or I²C Address Bit
Technical Specifications of BMP280 Sensor
- Manufacturer: Bosch Sensortec
- Pressure Range: 300 to 1100 hPa
- Pressure Accuracy: ±1 hPa
- Temperature Range: -40°C to +85°C
- Temperature Accuracy: ±1°C
- Supply Voltage: 1.8V to 3.6V (operational up to 5V on breakout boards)
- Interface: I²C and SPI
- I²C Address: 0x76 or 0x77 (configurable)
- Power Consumption: 2.7 µA in sleep mode
- Resolution: 0.16 Pa (pressure), 0.01°C (temperature)
How Does BMP280 Differ from BMP180?
- Communication: BMP180 supports only I²C, while BMP280 supports both I²C and SPI.
- Power Efficiency: BMP280 consumes less power and operates more efficiently in battery-powered devices.
- Accuracy: BMP280 provides better accuracy and higher resolution readings.
- Temperature Range: BMP280 supports a wider temperature range from -40°C to +85°C.
- Speed: BMP280 offers faster sampling rates and data output.
Connecting BMP280 Sensor with Arduino
Let’s see how to connect the BMP280 sensor with an Arduino board and read real-time temperature and pressure data.
What You Need
- Arduino Uno (or any other compatible board)
- BMP280 Sensor Module
- Jumper Wires
- Breadboard (optional)
Wiring Diagram
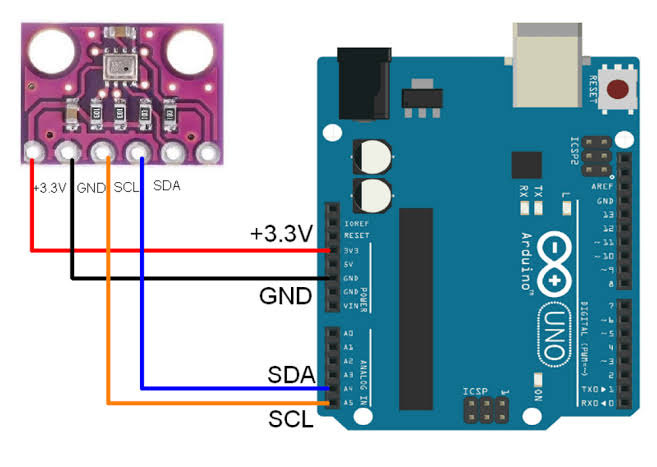
- VCC → 3.3V
- GND → GND
- SDA → A4 (Arduino Uno)
- SCL → A5 (Arduino Uno)
Arduino Code Example
Before uploading the code, make sure you’ve installed the Adafruit BMP280 Library and the Adafruit Unified Sensor Library from the Arduino Library Manager.
#include <Wire.h>
#include <Adafruit_Sensor.h>
#include <Adafruit_BMP280.h>

Adafruit_BMP280 bmp; // I2C

void setup() {
  Serial.begin(9600);
  if (!bmp.begin(0x76)) {
    Serial.println("Could not find a valid BMP280 sensor, check wiring!");
    while (1);
  }
  Serial.println("BMP280 Sensor initialized successfully!");
}

void loop() {
  Serial.print("Temperature = ");
  Serial.print(bmp.readTemperature());
  Serial.println(" °C");

  Serial.print("Pressure = ");
  Serial.print(bmp.readPressure() / 100.0);
  Serial.println(" hPa");

  Serial.print("Approx. Altitude = ");
  Serial.print(bmp.readAltitude(1013.25)); // sea-level pressure
  Serial.println(" m");

  Serial.println("------------------------------------");
  delay(2000);
}
After uploading, open the Serial Monitor at 9600 baud. You’ll see live readings of temperature, pressure, and altitude refreshing every 2 seconds.
Applications of BMP280 Sensor
- Weather Monitoring Systems: Used in IoT weather stations for measuring pressure and temperature trends.
- Drones and UAVs: Helps maintain stable altitude and improves flight accuracy.
- GPS Correction: Enhances location data by providing precise altitude information.
- Smartphones and Wearables: Used in modern devices for altitude and environment tracking.
- Indoor Navigation: Determines floor level changes within buildings.
- Home Automation: Integrated into HVAC systems to monitor environmental conditions.
- Scientific Research: Used in laboratory and educational experiments for atmospheric study.
Tips for Accurate Readings
- Keep the sensor away from direct heat sources or drafts.
- Allow the sensor to stabilize for a few seconds after power-up.
- Use proper calibration values for altitude estimation (default is 1013.25 hPa at sea level).
- Mount the sensor on a stable surface to avoid vibration effects.
Wrapping Up
So that’s everything you need to know about the BMP280 Sensor — from how it works to how you can use it in your Arduino or IoT projects. This tiny but powerful sensor gives you highly accurate environmental data and is perfect for building weather stations, drones, or even smart home devices. We hope this guide helps you get started confidently. If you have any questions, feel free to drop them in the comments — we’re here to help!