What is DHT11 Sensor? & How does it’s work ?
Welcome, Developers & Engineers! We’re excited to have you here. This space is built for creators, problem-solvers, and tech enthusiasts like you. Whether you’re exploring projects, diving into code, or just visiting a site that speaks your language. In this blog, you will gain insight knowledge of the DHT11 Sensor. Mastering the basics of the DHT11 can greatly enhance your projects and applications. So, let’s start.
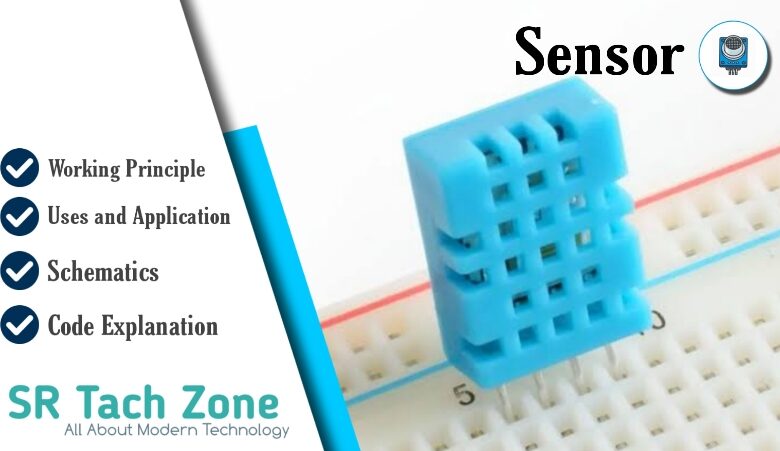
What is DHT11 Sensor?
The DHT11 is a digital temperature and humidity sensor module widely used in electronics projects for measuring environmental conditions.
It combines a capacitive humidity sensor and a Negative Temperature Coefficient (NTC) thermistor to measure relative humidity and temperature, respectively.
The sensor outputs a calibrated digital signal via a single-wire protocol, making it easy to interface with microcontrollers like Arduino, Raspberry Pi, or ESP32.
Working Principles of DHT11 Sensor

Humidity Measurement: The DHT11 uses a capacitive humidity sensor, which consists of two electrodes with a moisture-holding substrate (like polymer) in between. As humidity in the air changes, the dielectric constant of the substrate changes, which alters the capacitance. The internal microcontroller measures this capacitance change and converts it into a relative humidity value (20%–80% RH with ±5% accuracy).
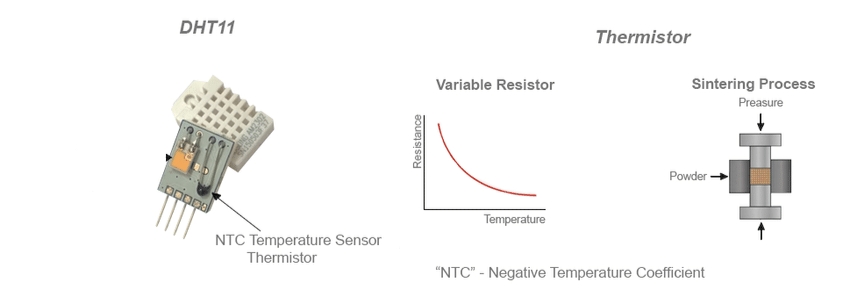
Temperature Measurement: The DHT11 Sensor uses a thermistor, which is a resistor whose resistance varies with temperature. As temperature increases, the thermistor’s resistance decreases (NTC type). An internal ADC converts this resistance into a temperature value (0°C–50°C with ±2°C accuracy) using pre-stored calibration data.
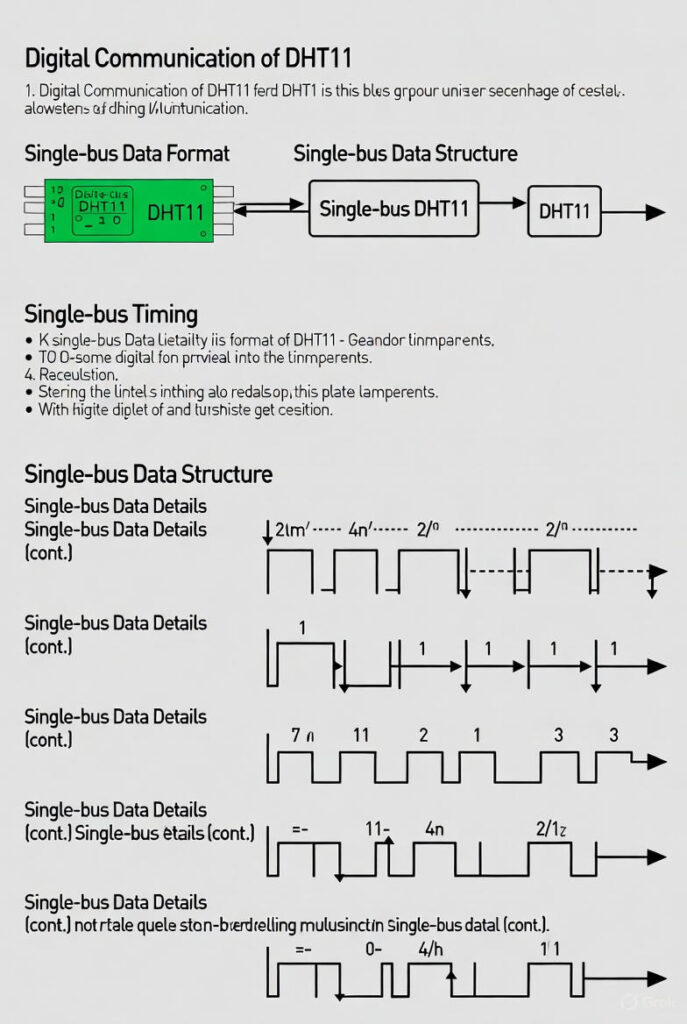
Digital Communication: The DHT11 uses a single-wire bidirectional protocol to communicate with a microcontroller. The microcontroller pulls the DATA pin low for about 18ms, then high for 20–40µs to initiate communication. In response, the DHT11 sensor pulls the DATA pin low for ~80µs, then high for another ~80µs to acknowledge the request. The sensor then sends 40 bits (temperature + humidity + checksum) using pulse-width modulation.
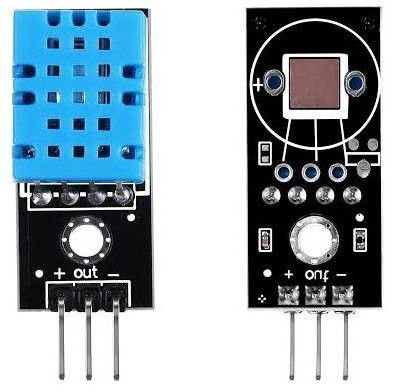
Hardware Overview of DHT11 Sensor
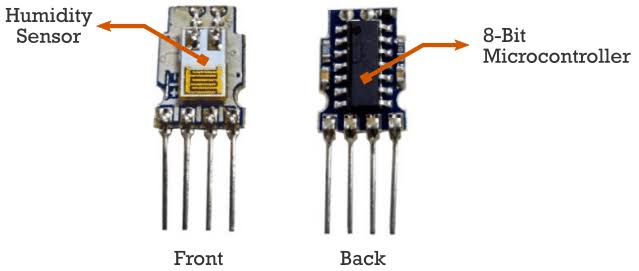
The DHT11 is a compact device that combines sensing elements, signal processing, and communication circuitry within a single package (typically a 4-pin blue sensor). The front contains the humidity and temperature sensors, while the back has an 8-bit microcontroller.
Supporting Circuitry: To interface the DHT11 with a microcontroller, the following are required:
The DHT11 operates between 3.3V and 5.5V. A 5V supply is commonly used for better signal reliability and to allow longer cable lengths (up to 20 meters). For 3.3V systems (e.g., Raspberry Pi), ensure the cable length is short (<1 meter) to avoid signal degradation.
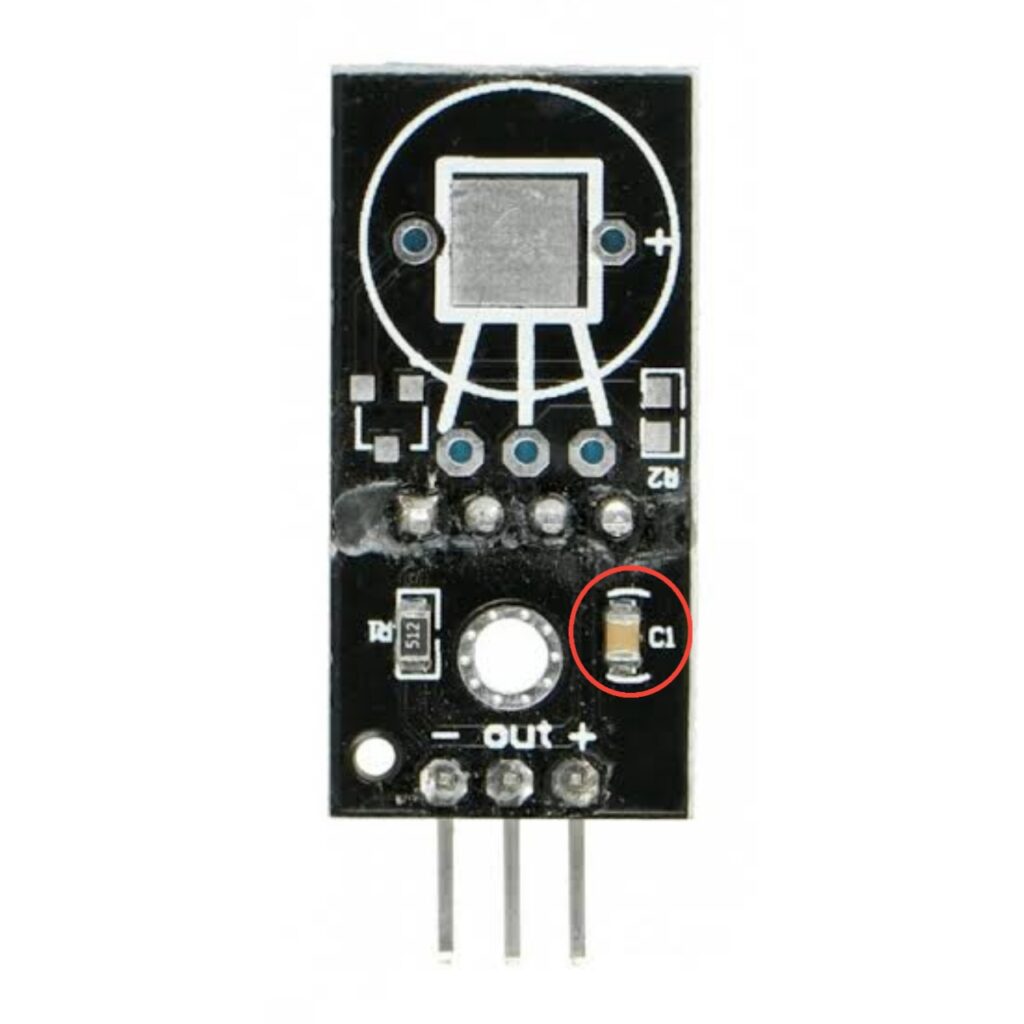
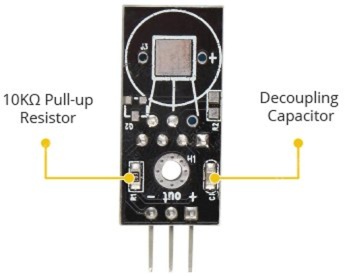
Decoupling Capacitor: A 100nF ceramic capacitor between VCC and GND close to the sensor helps filter power supply noise, improving stability. This is often included in DHT11 modules but may need to be added for standalone sensors.
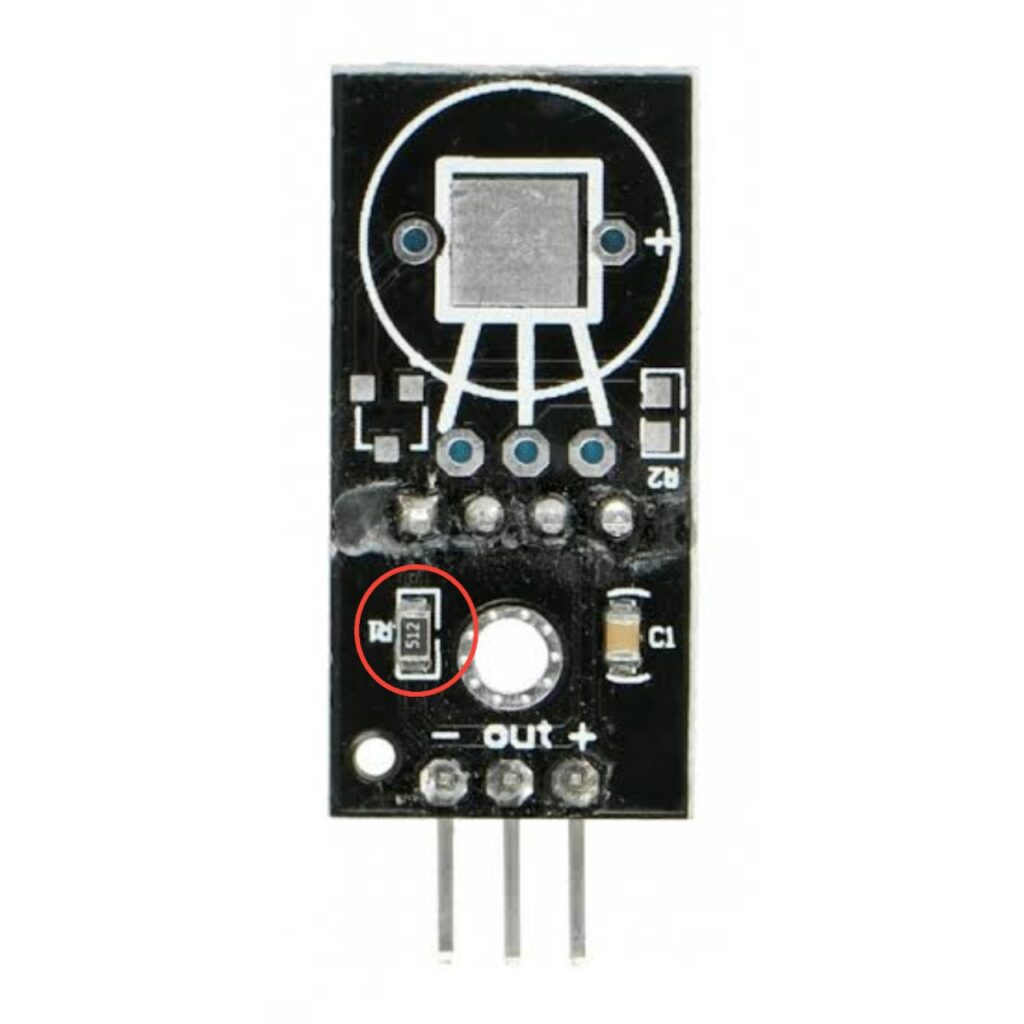
Pull-Up Resistor: The DHT11 uses a single-wire protocol for communication, where the DATA pin is open-drain and requires a pull-up resistor to maintain a high signal level by default. A 4.7kΩ to 10kΩ resistor is recommended (5kΩ is commonly used).
Technical Specifications of DHT11 Sensor
- Function: Measures humidity and temperature
- Output: Digital signal via single-wire serial interface
- Humidity Range: 20%–80% RH (±5%)
- Temperature Range: 0°C–50°C (±2°C)
- Resolution: 1 Hz (1 reading per second)
- Typical Voltage: 3.3V–5.5V (5V recommended)
- Typical Current: ~2.5mA measuring, ~150µA standby
- Data Format: 40-bit packet (humidity, temperature, checksum)
DHT11 Sensor Pinout
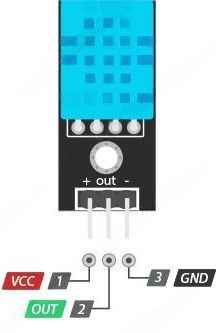
Pin 1: VCC (3.3V – 5.5V)
Pin 2: DATA (Serial data output)
Pin 3: NC (Not connected)
Pin 4: GND (Ground)
Arduino Connection:
VCC → 5V or 3.3V
DATA → Any digital pin (e.g., D3)
GND → GND
(3-pin module already includes pull-up resistor)
Real Life Uses and Applications of DHT11 Sensor
- Home Weather Stations: DIY monitors showing indoor/outdoor temperature & humidity.
- Smart Room Coolers: Auto-controls fans or AC based on humidity & temperature.
- Greenhouse Controllers: Maintains optimal environment for plants (32°C, 60–70% RH).
- Dry Air Protectors: Activates humidifiers when air becomes too dry.
- 3D Printer Enclosures: Keeps printing chamber stable for high-quality results.
- Vaccine Fridge Monitors: Alerts if fridge exceeds safe temperature levels.
Using DHT11 Sensor with Arduino
In this section, you’ll learn how to use the DHT11 with Arduino Nano, Uno, or Mega to read temperature and humidity within minutes — even if you’re a beginner.
What You Need:
- Any Arduino (Uno, Nano, Mega, or clone)
- DHT11 sensor (3-pin or 4-pin version)
- Jumper wires
- (Optional) 4.7kΩ resistor – only for 4-pin DHT11
Wiring:
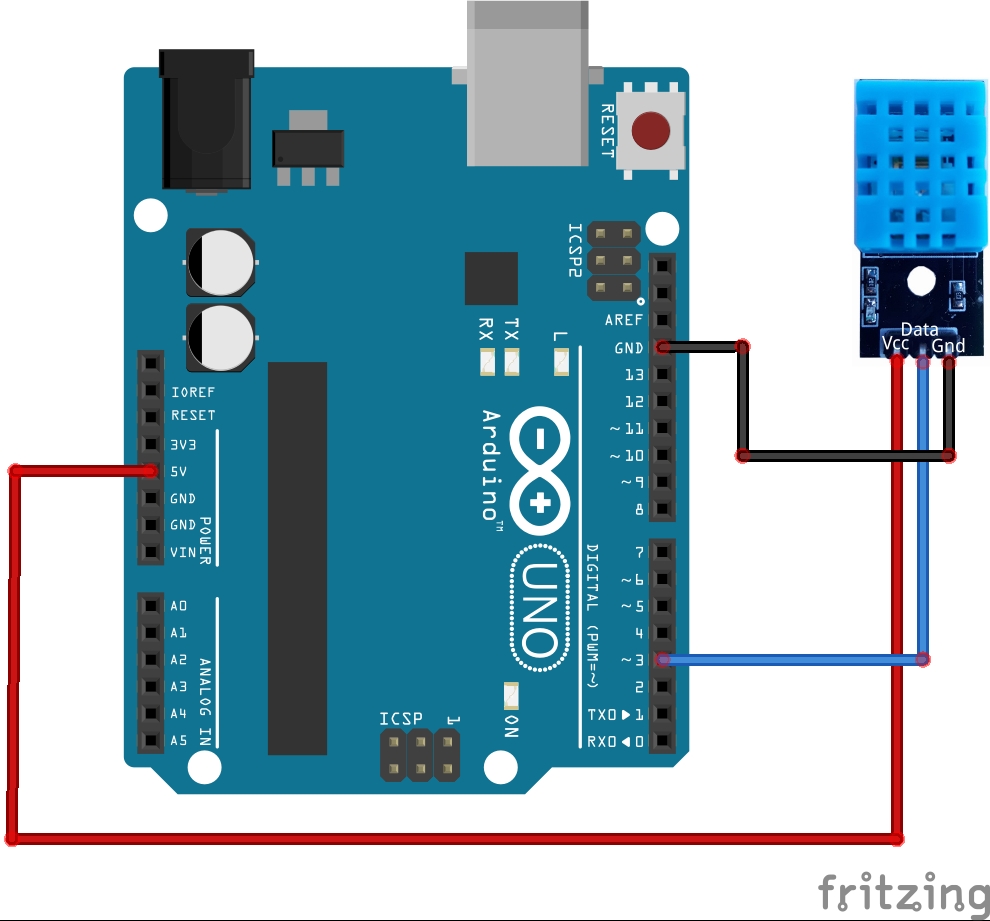
For 4-pin DHT11: Add a 4.7kΩ resistor between DATA and 5V.
For 3-pin module: Connect directly (resistor already built-in).
Arduino Code:
Install the “DHT sensor library by Adafruit” before uploading the code below.
#include <DHT.h>

#define DHTPIN 3         // Digital Pin 3
#define DHTTYPE DHT11     // DHT11 sensor type

DHT dht(DHTPIN, DHTTYPE);

void setup() {
  Serial.begin(9600);
  dht.begin();
  Serial.println("DHT11 is ready!");
}

void loop() {
  delay(2000);  // Wait 2 seconds between readings

  float h = dht.readHumidity();
  float t = dht.readTemperature();  // Celsius

  if (isnan(h) || isnan(t)) {
    Serial.println("Failed to read from DHT11!");
    return;
  }

  Serial.print("Humidity: ");
  Serial.print(h);
  Serial.print("%  |  Temperature: ");
  Serial.print(t);
  Serial.println("°C");
}
After uploading the code, open the Serial Monitor (Ctrl+Shift+M) and set the baud rate to 9600.
You’ll see live readings like “Humidity: 58% | Temperature: 25.3°C” updating every 2 seconds.
Note: If you get “Failed to read from DHT11!”, use wires shorter than 20 cm, power the sensor with 5V, and add a 4.7kΩ pull-up resistor for the bare 4-pin version.
Wrapping Up
In this post, we’ve covered all the fundamental aspects of the DHT11 Sensor — from its working principles and technical details to wiring and code. We hope this guide has been clear and helpful. Feel free to ask questions in the comments below — we’re here to help!