What is DHT22 Sensor? & How does it’s work ?

Welcome, Developers & Engineers! We’re excited to have you here. This space is built for creators, problem-solvers, and tech enthusiasts like you. Whether you’re exploring projects, diving into code, or just visiting a site that speaks your language. In this blog, you will gain in-depth knowledge of the DHT22 Sensor. Mastering the basics of the DHT22 can greatly enhance your projects and applications. So, let’s start.
What is DHT22 Sensor?

The DHT22 (also known as AM2302) is a high-precision digital temperature and humidity sensor module widely used in professional electronics projects.
It combines a capacitive humidity sensor with an NTC thermistor and outputs a calibrated digital signal via a single-wire protocol,
making it perfect for Arduino, Raspberry Pi, ESP32, and industrial-grade data loggers.
Working Principles of DHT22 Sensor
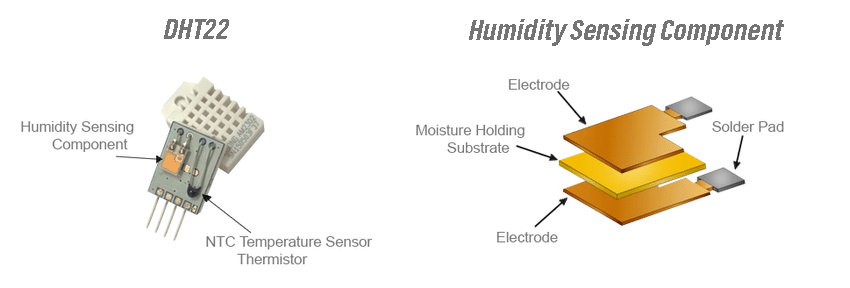
Humidity Measurement: The DHT22 uses an advanced capacitive polymer sensing element. Changes in ambient humidity alter the dielectric constant, producing a precise capacitance shift that is converted into 0–100% RH with ±2% accuracy.
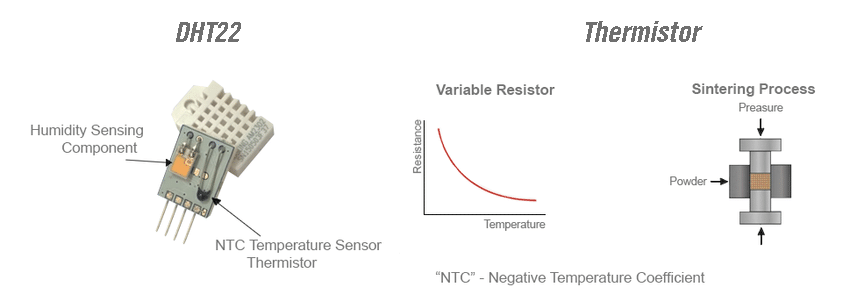
Temperature Measurement: A high-quality NTC thermistor paired with a 14-bit ADC delivers temperature readings from -40°C to +80°C with ±0.5°C accuracy.
Digital Communication: Identical single-wire protocol to DHT11, but transmits 40 bits at higher resolution: 16-bit humidity + 16-bit temperature + 8-bit checksum. Response time <2 seconds.
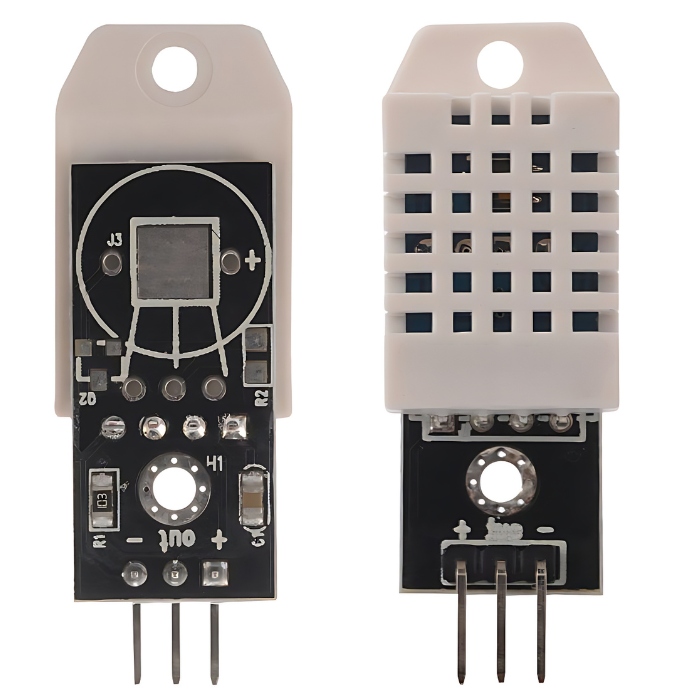
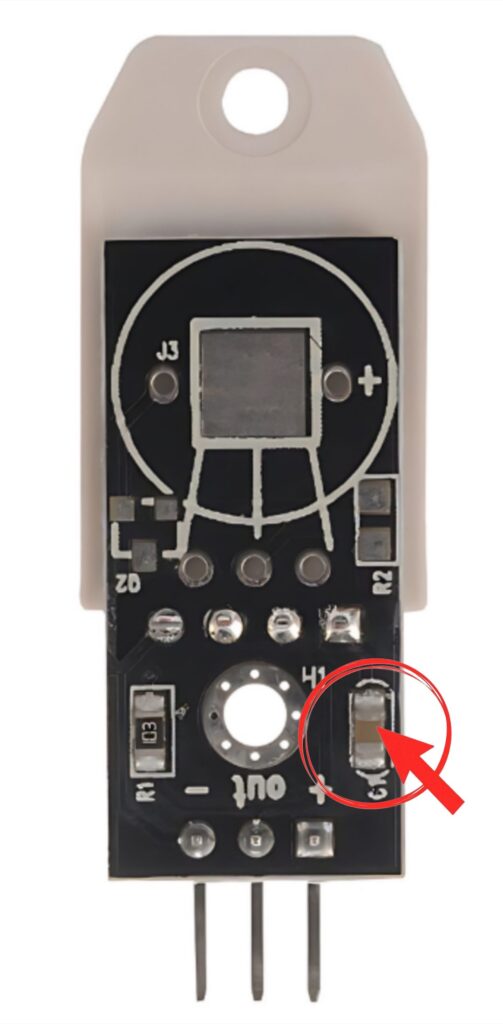
Hardware Overview of DHT22 Sensor
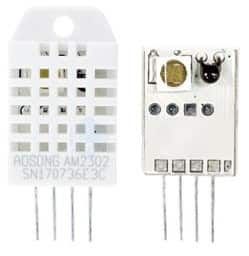
The DHT22 is housed in a robust white plastic case (4-pin package) containing the sensing element, 8-bit MCU, and calibration coefficients stored in OTP memory.
Supporting Circuitry:
- Operating voltage: 3.3V–5.5V (5V recommended)
- Decoupling: 100nF ceramic capacitor mandatory (already on module)
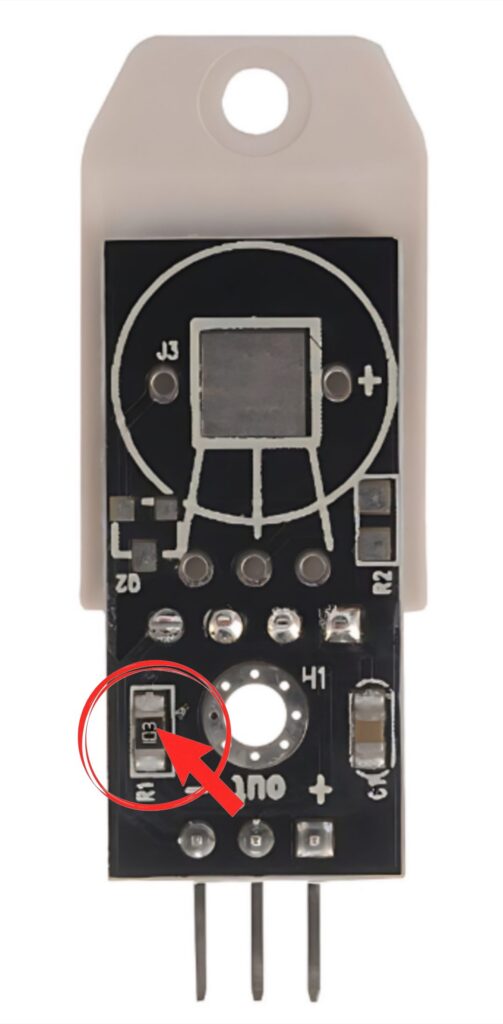
- Pull-up resistor: 4.7kΩ–10kΩ (built into 3-pin modules)
Technical Specifications of DHT22 Sensor
- Function: High-accuracy humidity & temperature
- Output: 40-bit digital single-wire
- Humidity: 0–100% RH, ±2% accuracy (max ±5%), 0.1% resolution
- Temperature: -40°C to +80°C, ±0.5°C accuracy, 0.1°C resolution
- Sampling rate: Max 0.5 Hz (one reading every 2 seconds)
- Current: 1–1.5mA measuring, 40–50µA standby
- Long-term stability: <±0.5% RH/year, <±0.2°C/year
DHT22 Sensor Pinout
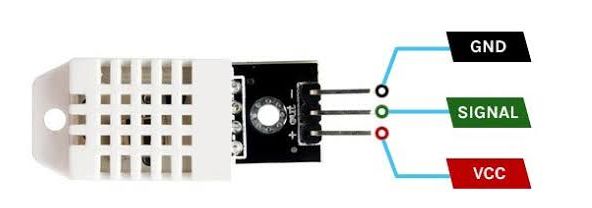
Pin 1 – VCC (3.3–5.5V)
Pin 2 – DATA (serial data)
Pin 3 – NC (not connected)
Pin 4 – GND
Arduino Connection:
VCC → 5V or 3.3V
DATA → Any digital pin (we use pin 3)
GND → GND
(3-pin module = direct connect, pull-up already inside)
Real Life Uses and Applications of DHT22 Sensor
- Precision Home Weather Stations with ±0.5°C accuracy
- Professional Greenhouse & Hydroponics (0–100% RH range)
- Cold-chain monitoring (-40°C capability)
- Museum-grade artifact preservation
- HVAC data logging with long-term stability
- Soil moisture + air combo systems
- Industrial dehumidifier controllers
- Asthma-trigger early warning systems
- High-end 3D printer enclosures (Resin & ABS)
- Server room temperature mapping
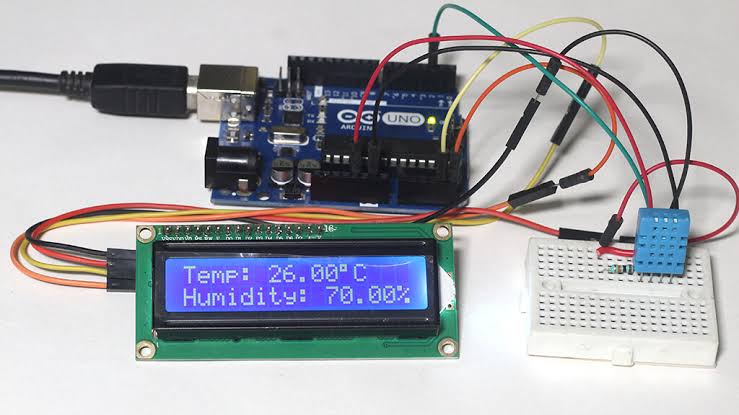
Using DHT22 Sensor with Arduino
In this part we will learn how you can use DHT22 with Arduino Nano, Uno, or Mega to read temperature and humidity in just 5 minutes – even if you are a complete beginner.
What You Need
- Any Arduino (Uno, Nano, Mega, or clone)
- DHT22 sensor (3-pin or 4-pin version)
- Jumper wires
- (Optional) 4.7 kΩ resistor – only for 4-pin DHT22
Wiring:
For 4-pin DHT22: add a 4.7 kΩ resistor between DATA and 5V.
For 3-pin DHT22 module: connect directly – resistor is already inside.
Code Example:
#include <DHT.h>

#define DHTPIN 3          // Digital Pin 3
#define DHTTYPE DHT22     // Change to DHT22

DHT dht(DHTPIN, DHTTYPE);

void setup() {
  Serial.begin(9600);
  dht.begin();
  Serial.println("DHT22 is ready!");
}

void loop() {
  delay(2000);  // Minimum 2-second delay for DHT22

  float h = dht.readHumidity();
  float t = dht.readTemperature();  // Celsius

  if (isnan(h) || isnan(t)) {
    Serial.println("Failed to read from DHT22!");
    return;
  }

  Serial.print("Humidity: ");
  Serial.print(h, 1);  // 1 decimal place
  Serial.print("%  |  Temperature: ");
  Serial.print(t, 1);
  Serial.println("°C");
}
Now you will see ±0.5°C accurate data instantly! Open Serial Monitor (Ctrl+Shift+M), set 9600 baud, and watch live readings every 2 seconds.
Note: If you see errors – use <20 cm wires, power from 5V, add 4.7 kΩ pull-up for bare 4-pin sensor.
Wrapping up
In this post, we’ve covered all the fundamental aspects of the DHT22 Sensor – from internal polymer sensing technology to production-grade specifications and bullet-proof Arduino code.
We trust that the information provided has been clear and insightful.
Feel free to ask any questions you may have about this topic in the comment section below. We are here to help and provide additional clarification as needed.